WordPress Block Editor – Settings Section
This tutorial is part of our series WordPress Gutenberg: The Ultimate Guide For Non-Technical WordPress Users.
***
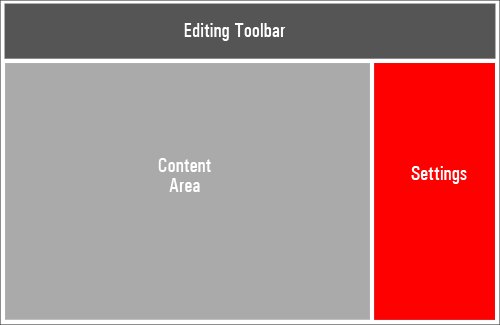
The WordPress block content editor interface is divided into three main sections:
- Editing Toolbar
- Content Area
- Settings Section (you are here)
In this tutorial, you will learn how to use the Settings Section of the WordPress block editor.
For a complete understanding of how to use the WordPress Block Editor, see the other tutorials in this series:
- How To Use WordPress Blocks
- How To Use The WordPress Block Editor Content Area
- How To Use The WordPress Block Editing Toolbar
***
WordPress Content Editor: Settings Section
The Gutenberg content editor interface contains a ‘Settings’ section for:
- Documents (e.g. Posts, Pages)
- Blocks
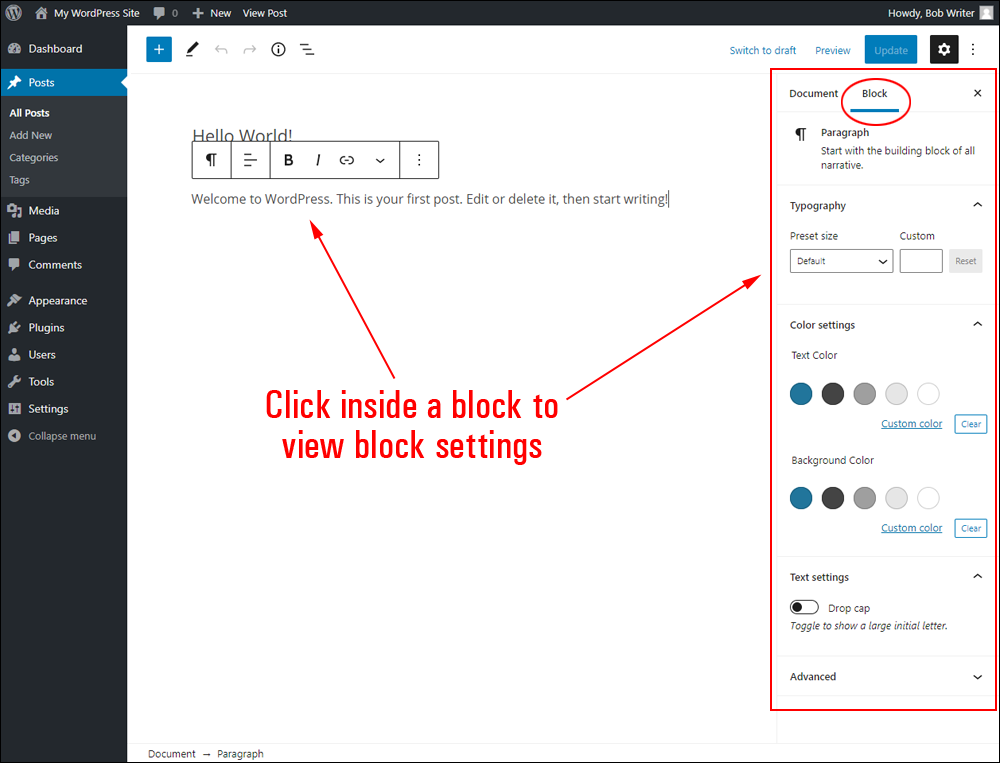
Block Settings
The Block Editor (located above each block in the content area) includes most of the settings you need to configure your blocks.
The Block Settings on the right-hand content editor sidebar let you configure additional settings and options that are specific for each block type.
To learn more about using blocks and how to configure individual block settings, see this tutorial: WordPress Content Editor – How To Use Blocks
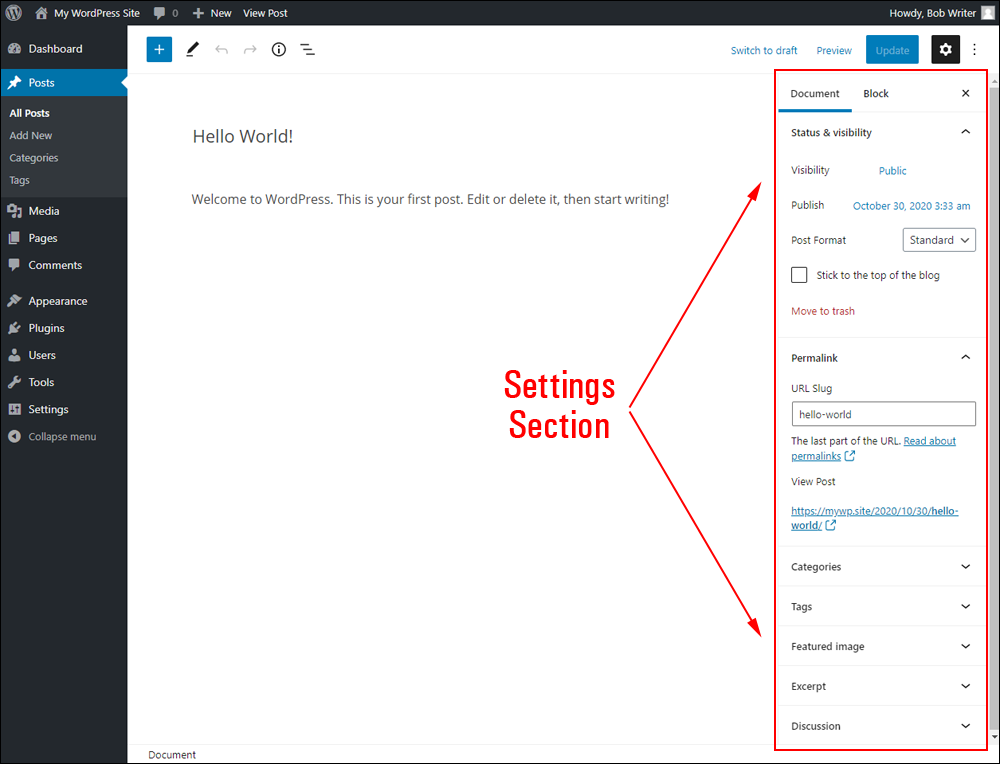
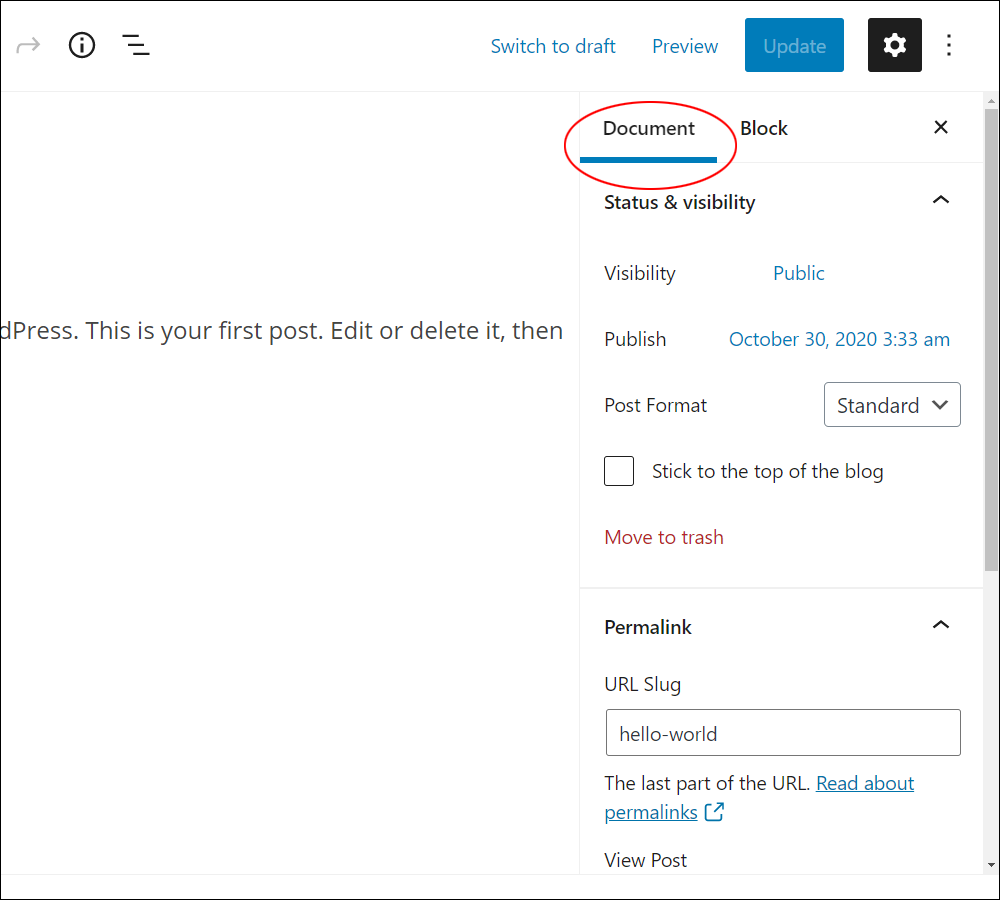
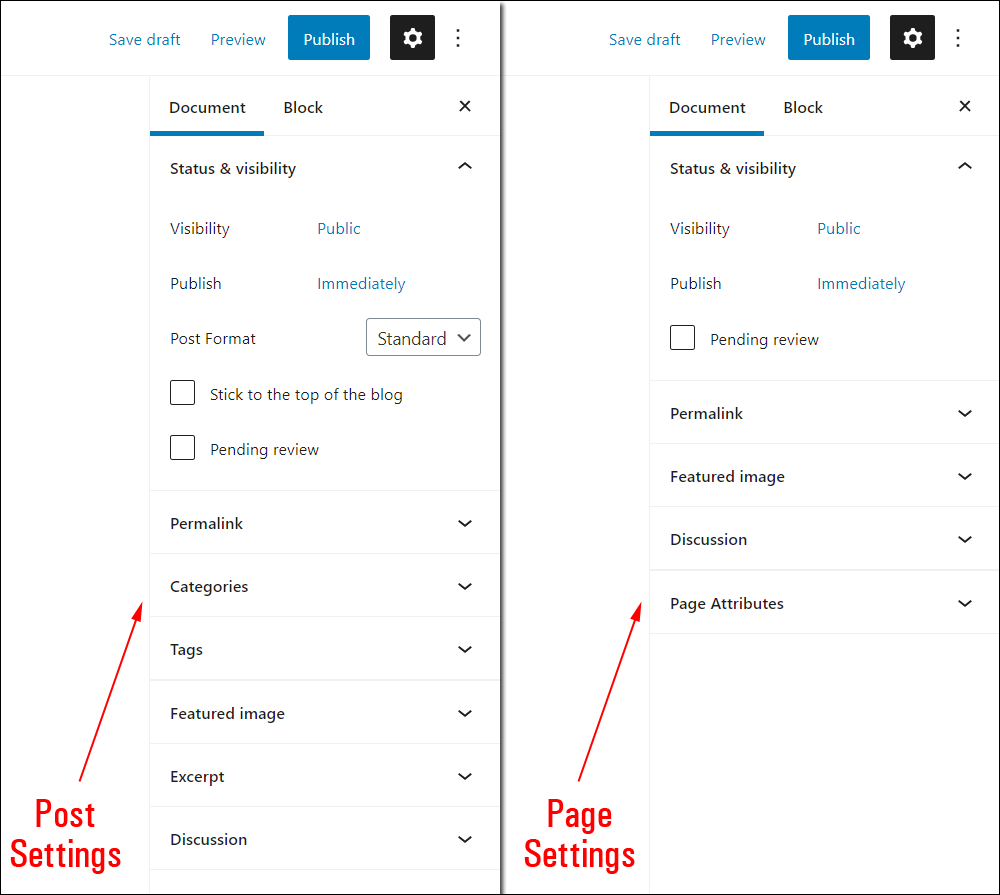
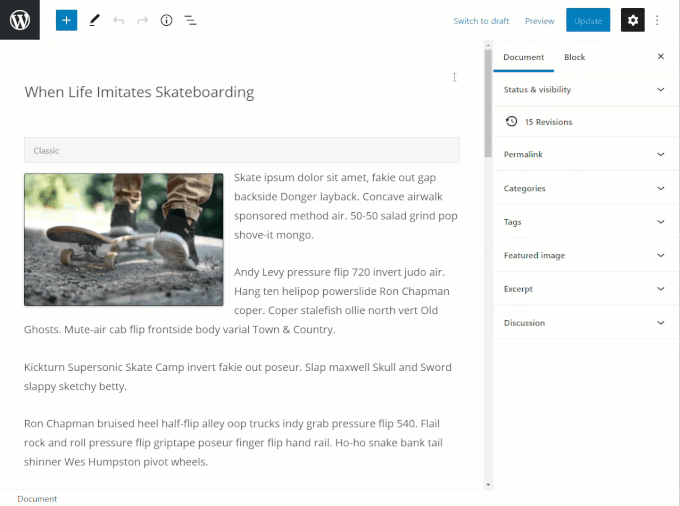
Document Settings
Document Settings apply to the entire post or page that you are working on.
In other words, think of these as your ‘Post’ or ‘Page’ settings rather than individual block settings.
![]()
Different settings will display in the Settings section of the content editor depending on whether you are working on a Post or a Page.
Post and Page settings are explained in more detail further below.
![]()
If you need help understanding the main differences between WordPress Posts and Pages (and when to use which type), see this tutorial: WordPress Posts vs WordPress Pages Explained
To learn more about creating and editing Posts in WordPress, see the tutorials below:
- How To Create A New Post In WordPress – Part 1
- How To Create A New Post In WordPress – Part 2
- How To Edit and Delete Posts In WordPress – Part 1
- How To Edit and Delete Posts In WordPress – Part 2
To learn more about creating and editing Pages in WordPress, see the tutorials below:
Post Settings
Post settings include:
- Status & Visibility
- Revisions
- Permalink
- Categories
- Tags
- Featured Images
- Excerpt
- Discussion
Page Settings
Page settings include:
- Status & Visibility
- Featured Images
- Discussion
- Page Attributes
Each of these sections is covered below.
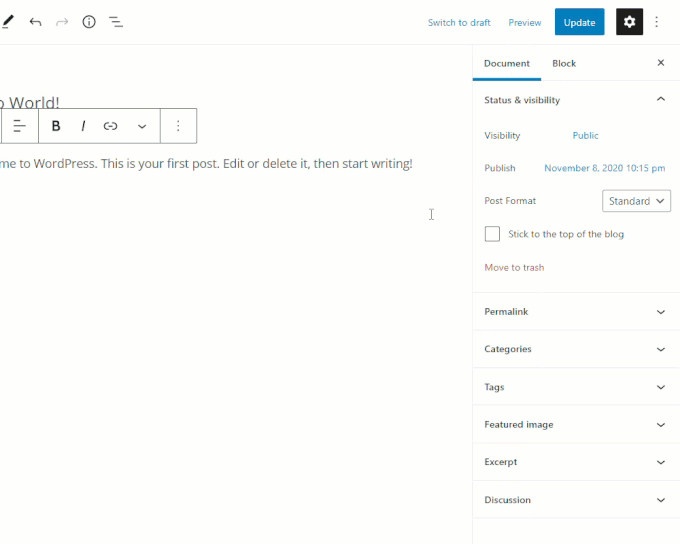
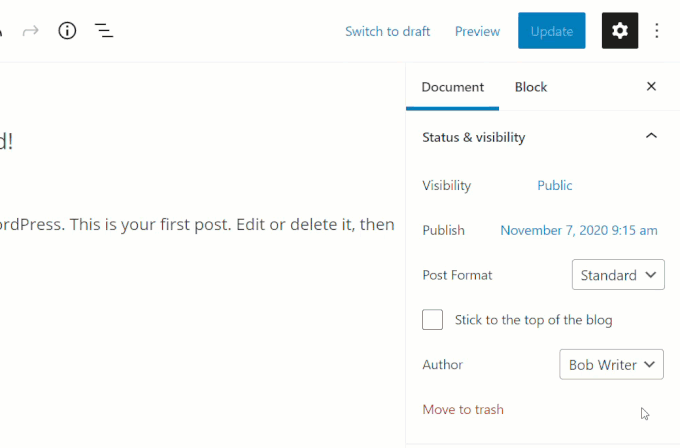
Status & Visibility
![]()
Not sure what the different statuses of your post or pages mean? The list and sections below will hopefully help you.
Page/Post Status
In WordPress, Posts and Pages can be assigned the following status:
- Published: Published posts and pages display to everyone who visits your site unless they’re set as ‘Private’ or ‘Password-Protected’ (see Visibility Settings below).
- Draft: A draft post is not visible to your site visitors and registered members or users unless they are a site administrator.
- Pending Review: A post marked as ‘Pending Review’ is similar to a draft post, but needs to be reviewed and approved for publication by a user with a minimum permission-level of Editor.
To learn how to assign user permissions in WordPress, see this tutorial: How To Manage WordPress Users
Page/Post Visibility
This section lets you specify the status and visibility settings of your post or page.
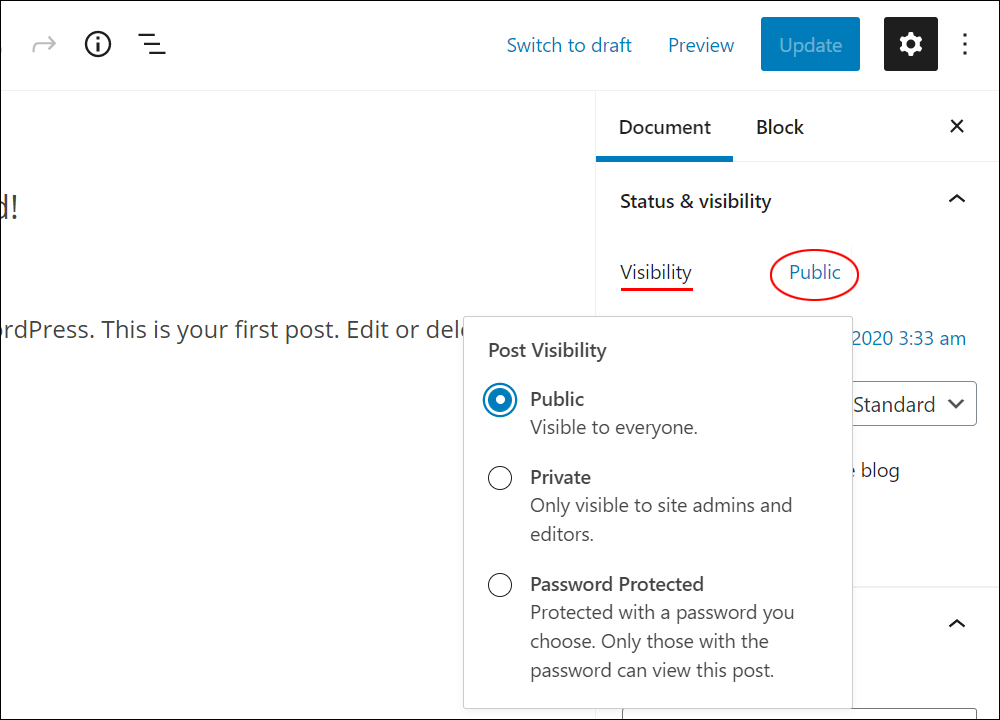
You can select the following visibility settings for your posts and pages:
- Public: Setting a post to ‘Public’ makes it visible to all visitors after the post or page has been published.
- Private: A ‘Private’ post is only visible to you (if you are the site administrator) and/or users with editor or administrative privileges. You must be logged into your site to view a private post.
- Password Protected: Password-protecting a post or page means that your post or page content can only be viewed by users with the correct password.
The Status & Visibility section includes the following additional settings:
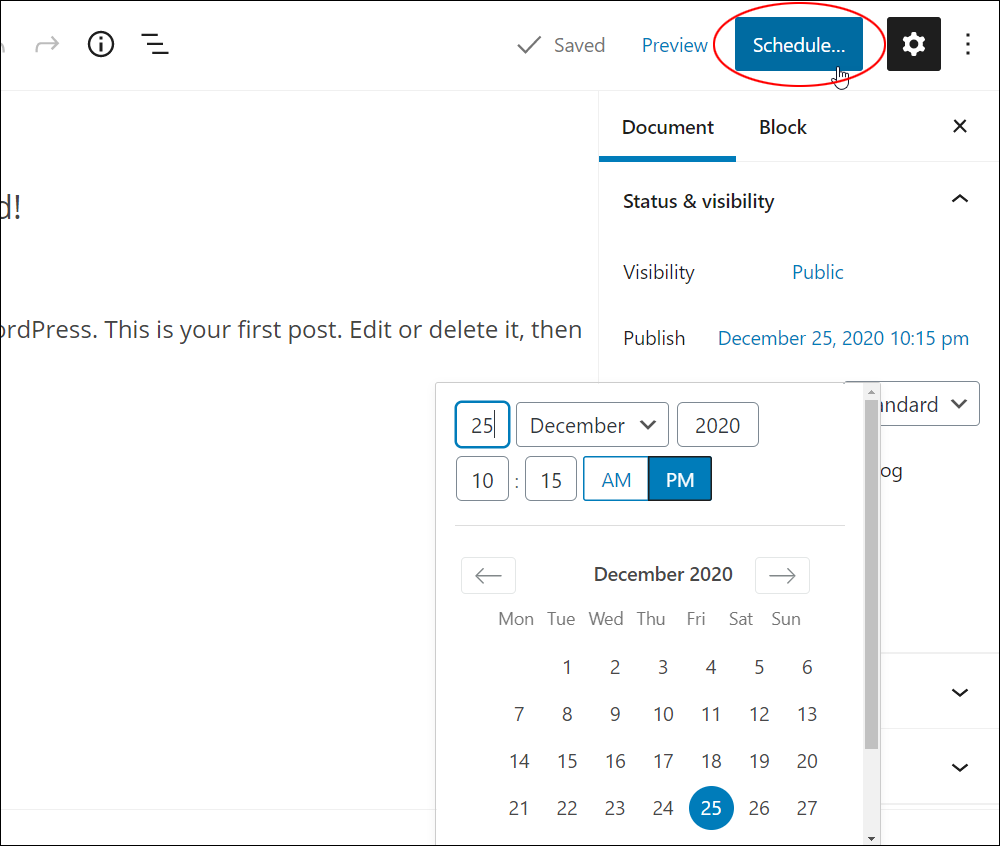
Page/Post Publishing
You can modify your post/page publishing dates and times in the ‘Publish’ settings section.
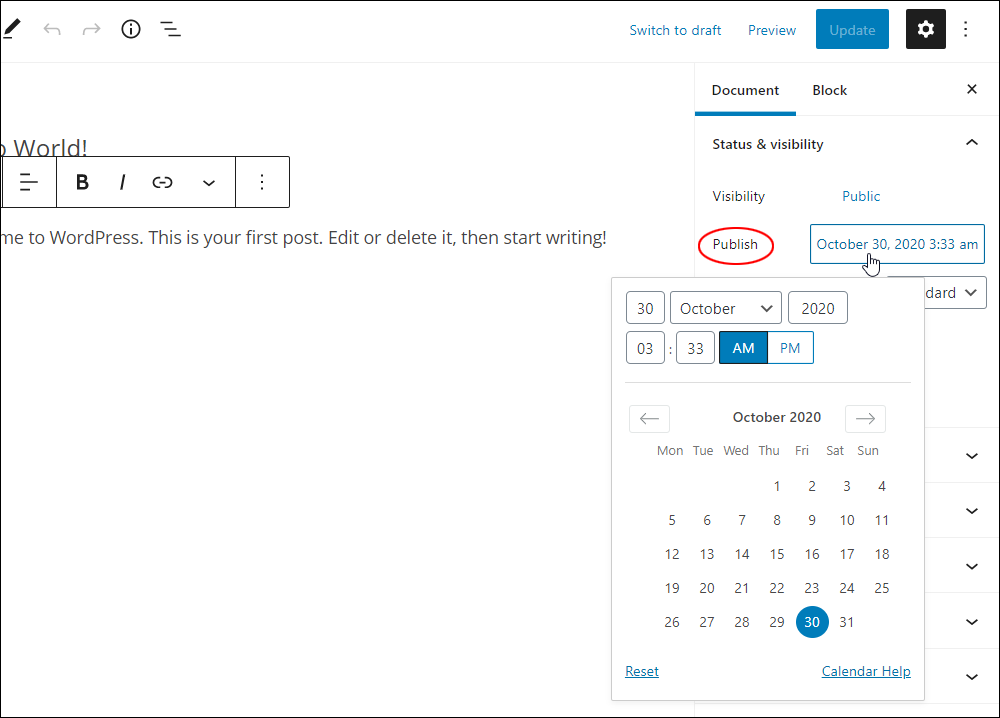
Note: You can select publishing options by clicking through the various features on your screen and also navigate through the calendar using various keyboard shortcuts.
Page/Post Scheduling
You can schedule your posts or pages to be published at a later (or earlier) date or time.
To learn more about scheduling posts/pages, see this tutorial: How To Schedule WordPress Posts & Pages
Post Format
Depending on the active theme installed on your site, you may see a ‘Post Format’ option displayed, allowing you to select a format for your post from a dropdown menu.
To learn more about using posts formats, see this tutorial: WordPress Post Formats Explained
Create Sticky Posts
You can create sticky posts by ticking the ‘Stick to the top of the blog’ checkbox.
To learn more about making posts ‘sticky’ in WordPress, see this tutorial: How To Create Sticky Posts In WordPress
Change Post Author
You can assign/reassign your post or page to a different author if your site has more than one user with a minimum user privilege of Author.
To learn more about changing post authors, see this tutorial: How To Change A Post Author In WordPress
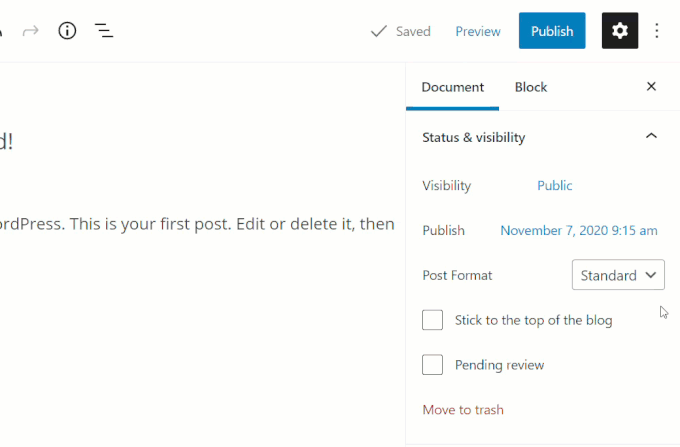
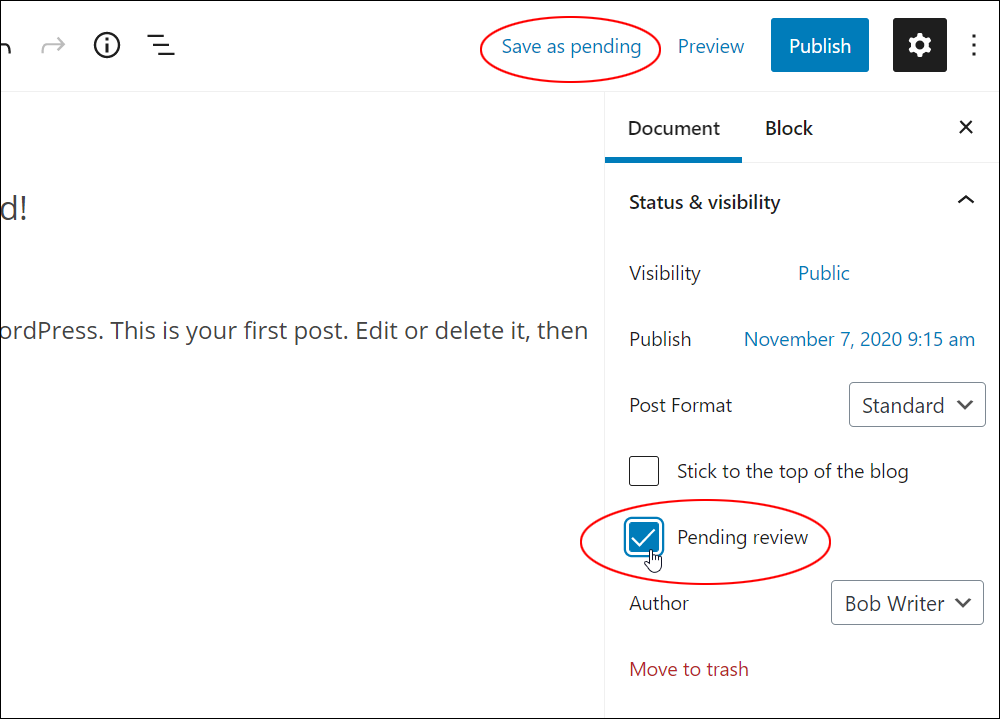
Pending Review
You can set draft documents to ‘Pending Review’ by ticking the Pending Review checkbox.
![]()
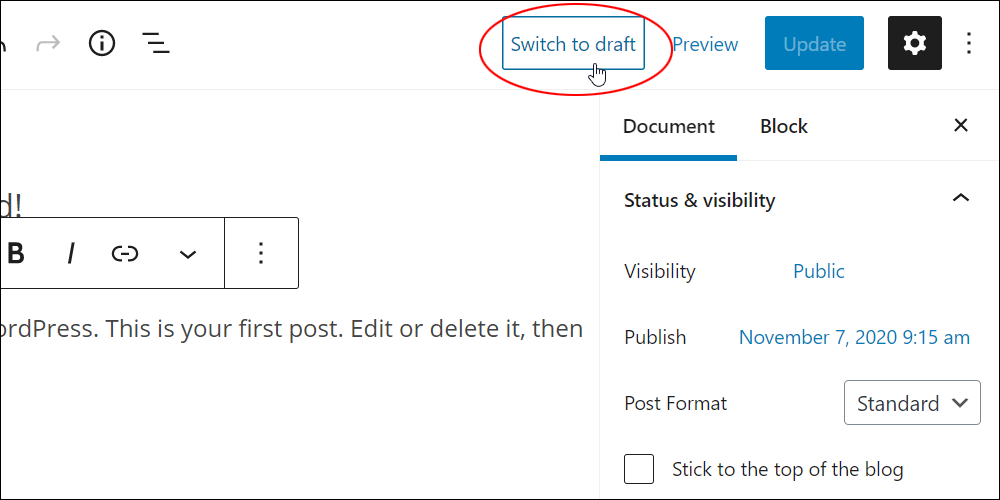
Note: The ‘Pending Review’ checkbox will not display if you have already published your post or page. To view the ‘Pending Review’ settings, save your published post or page as a draft first by clicking on ‘Switch to Draft’ (see the Editing Toolbar section for details).
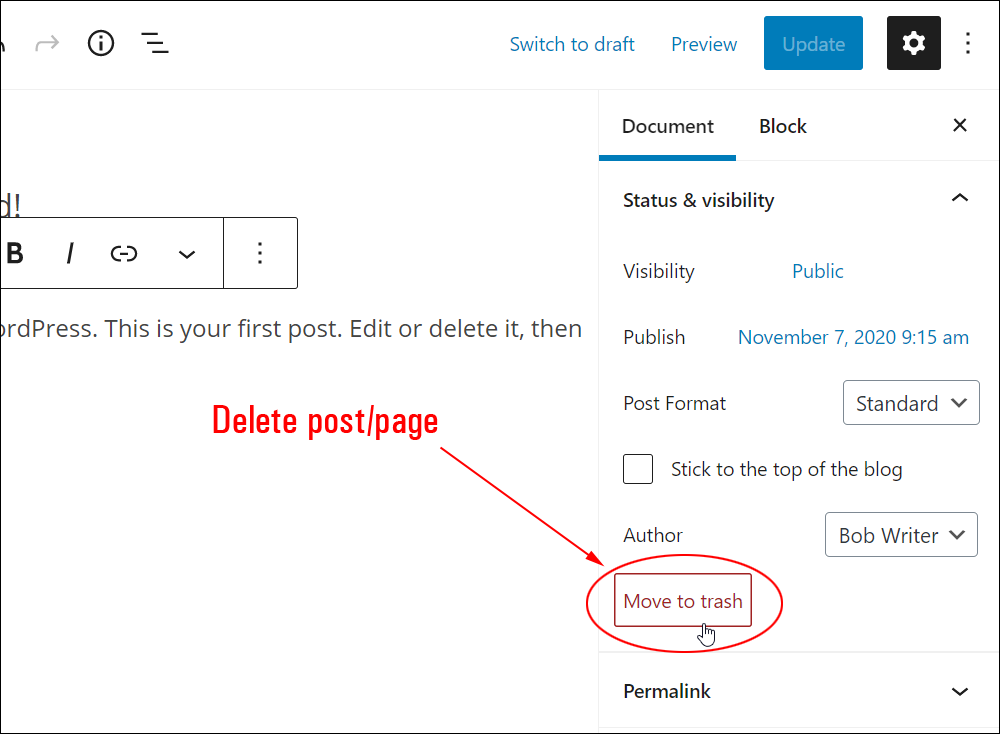
Move To Trash
You can delete your posts or pages by sending them to the trash.
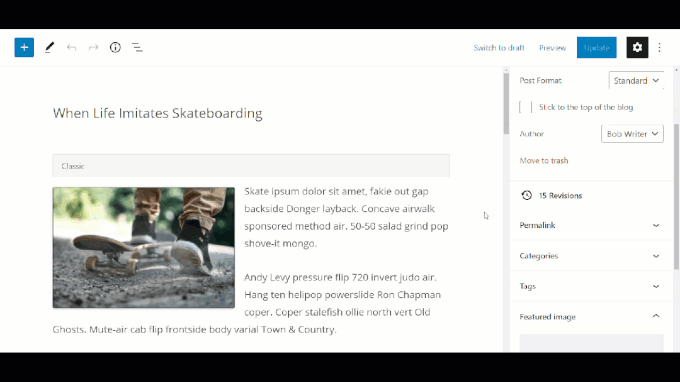
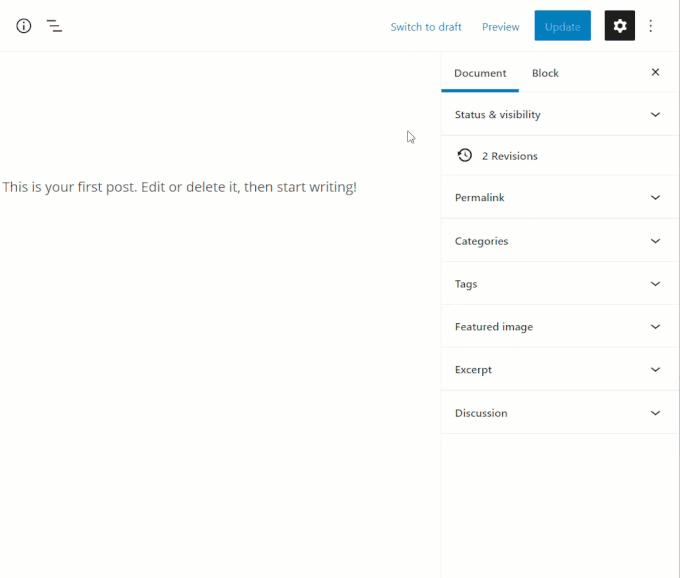
Revisions
Autosaving is automatically enabled for all WordPress posts and pages and does not overwrite your published content.
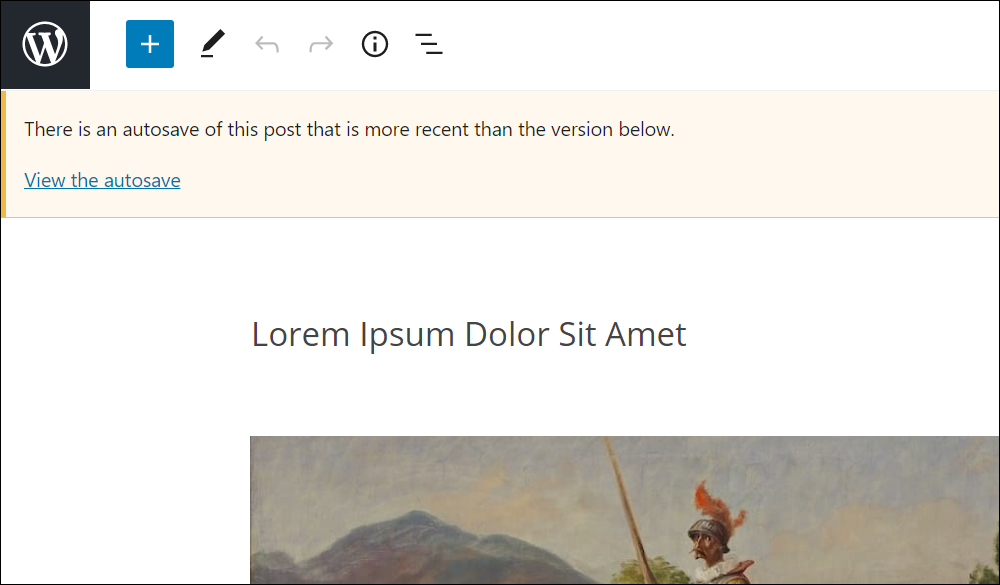
Also, every time you save your content, WordPress stores a revision in your database.
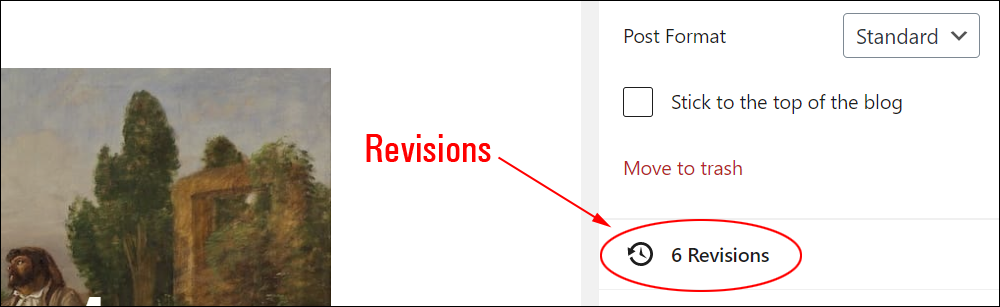
The WordPress revisions feature lets you go back and compare different versions of your post or page if you need to recover previously-written content.
(Post Revisions)
To learn more about using WordPress Autosave and Post Revisions, see this tutorial: WordPress Autosave & Post Revisions
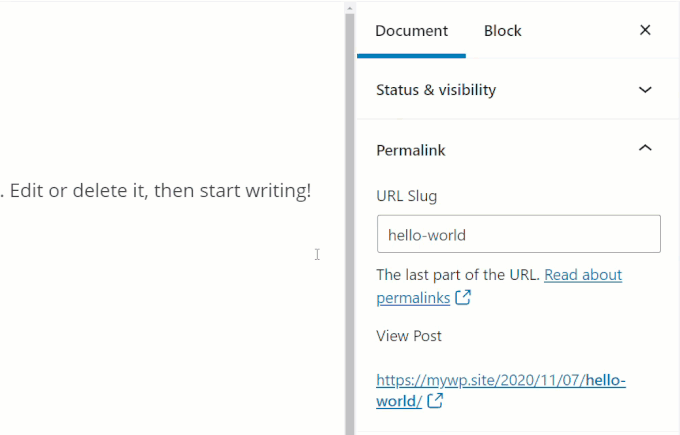
Permalink
The Permalink settings section lets you edit your post or page slug.
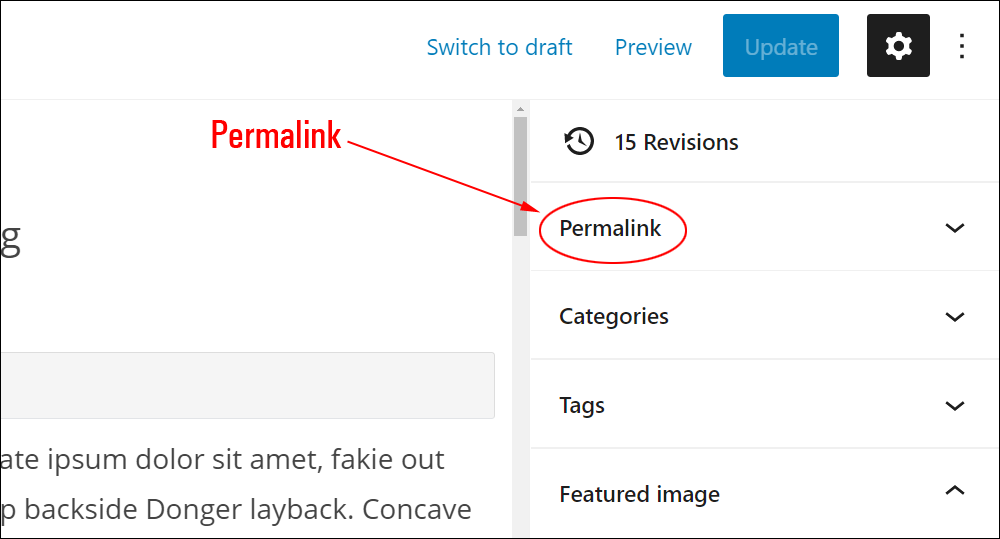
About Permalink settings:
- Permalink stands for “permanent link.” It is also referred to as a user-friendly URL, SEO-friendly URL, or pretty links.
- WordPress automatically creates permalinks for your posts and pages based on their title. Note: This feature must be configured in your site’s Permalink settings (Settings > Permalinks)
- Punctuation marks such as commas, quotes, apostrophes, and invalid URL characters are removed and spaces are substituted with dashes to separate each word in your post or page URLs.
- When you set a permalink URL for a post or page, WordPress makes sure that all links on your site will point to the correct URL, even if you edit the slug, change the category (posts), or set a different parent page.
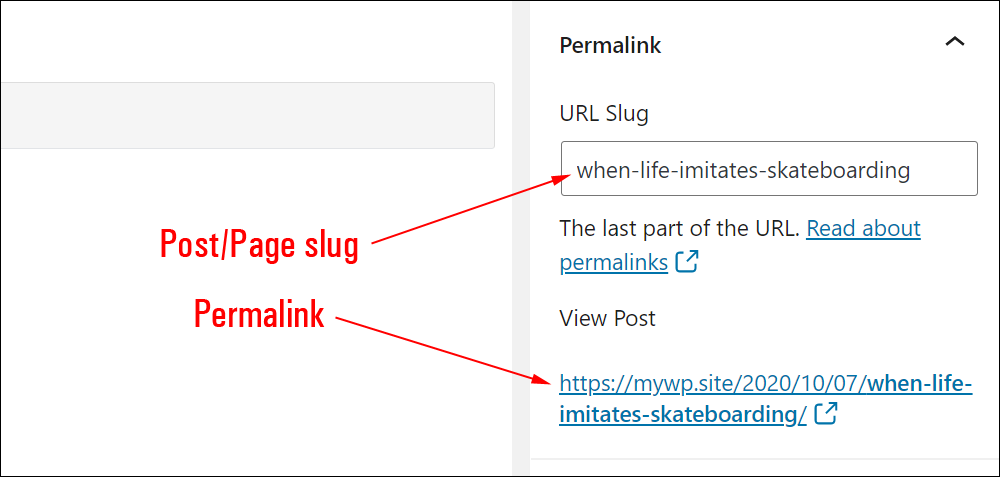
WordPress automatically creates a permalink as soon as you save or publish a new post or page based on their title.
You can manually change your permalink URL without editing your post or page title simply by editing the post or page slug.
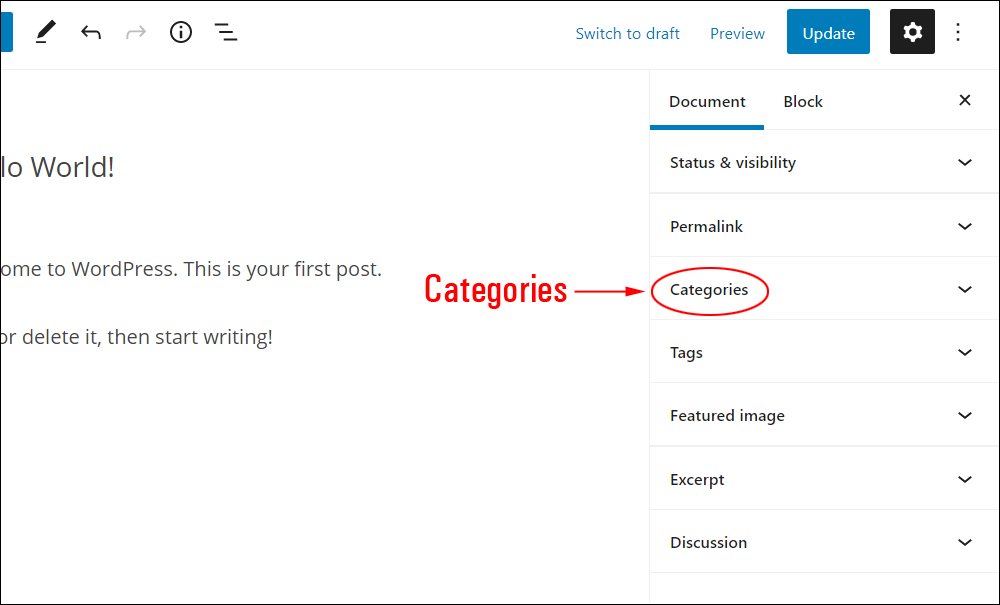
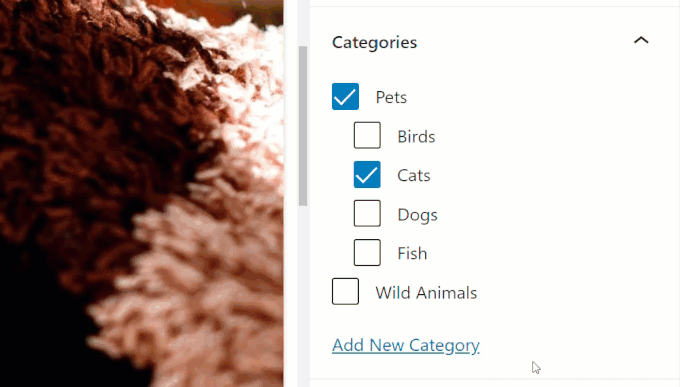
Post Categories
The Categories settings section lets you add and change your post categories.
About Categories settings:
- Categories allow you to classify your website’s posts into related topics. This helps to keep your content organized for your site visitors and search engines.
- Assigning categories to your posts also helps your site users navigate your content more easily and find what they are looking for quicker.
- WordPress provides a number of category features for sorting and grouping your content (e.g. ‘Post Archive’ pages).
- You can assign posts to existing categories and add new categories when creating new posts.
- You can assign multiple categories to posts.
- You can also create and manage your categories by selecting Posts > Categories in your administration menu.
You can assign categories to posts in this section.
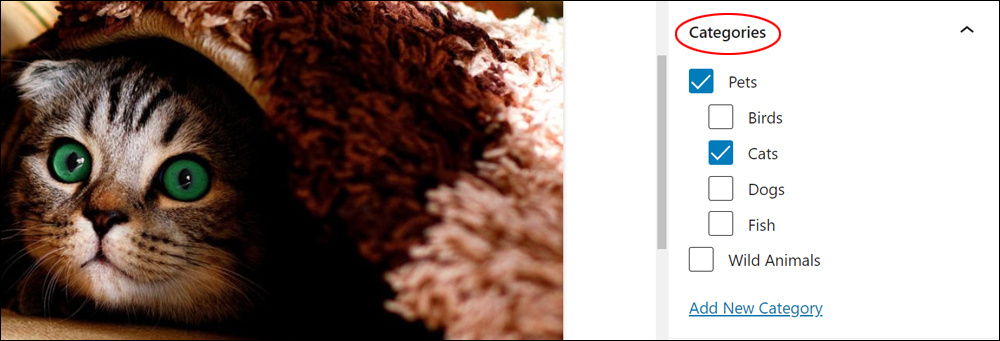
You can also add new categories ‘on the fly’ while creating or editing your posts.
Note: If your content editor’s settings section is not displaying the ‘Categories’ section, check that this panel is enabled in your ‘Options’ settings (More Tools & Options > Options> Document Panels).
To learn more about setting up and using categories, see this tutorial: Using Post Categories In WordPress
Post Tags
The Tags settings section lets you add tags to your posts.
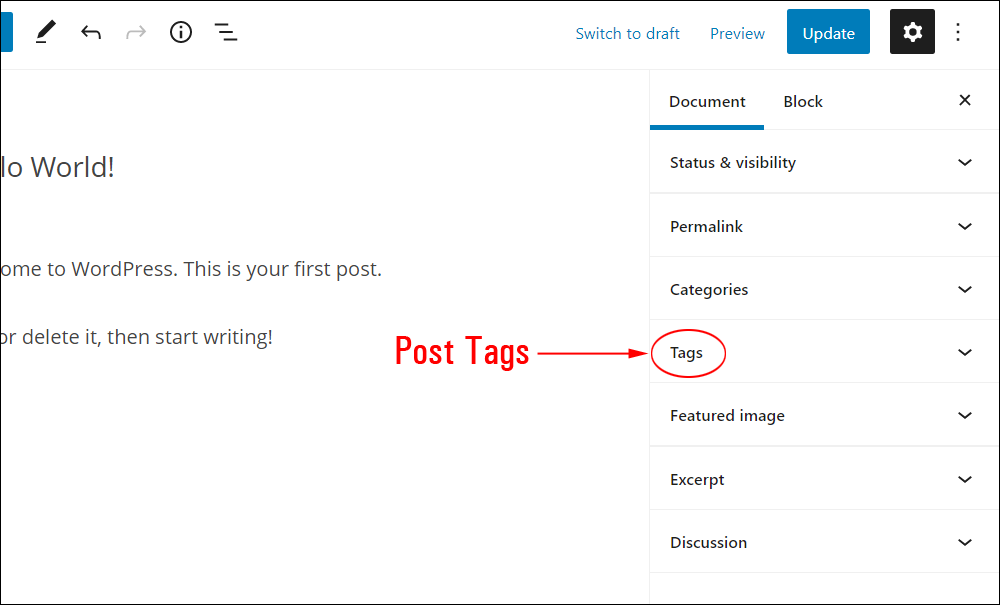
About Tags settings:
- Post tags provide a way to help organize your content at a more granular level than categories.
- Tags are like index entries for your posts.
- If your site displays a tag cloud, visitors can click on a tag and bring up a list of posts assigned to that tag.
- Your theme, theme styles, or page layout control how tags display on your site. Depending on how these elements are configured:
- Tags may or may not display on your posts,
- Tags may display differently on your site (e.g. by using different styles),
- Tags may appear in different sections of your site or in different areas of your page.
To add new tags to your posts, type your tags into the ‘Add New Tag’ field separated by commas, or press the ‘Enter’ key.
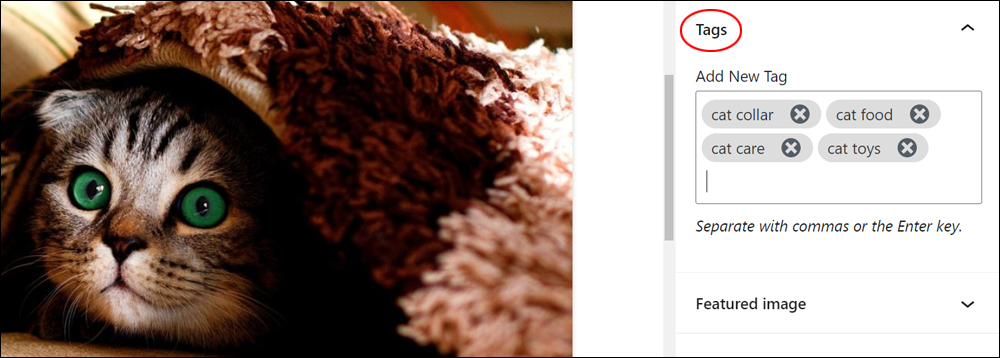
The Tags feature will suggest existing tags as you type or enter tags into this section. This lets you keep your posts tightly grouped around the same tags.
To accept and add the auto-suggested tag to your post, just click on an item from the dropdown list.
Note: If your content editor’s settings section is not displaying the ‘Tags’ section, check that this panel is enabled in your ‘Options’ settings (More Tools & Options > Options> Document Panels).
To learn more about using tags, see this tutorial: Using Post Tags In WordPress
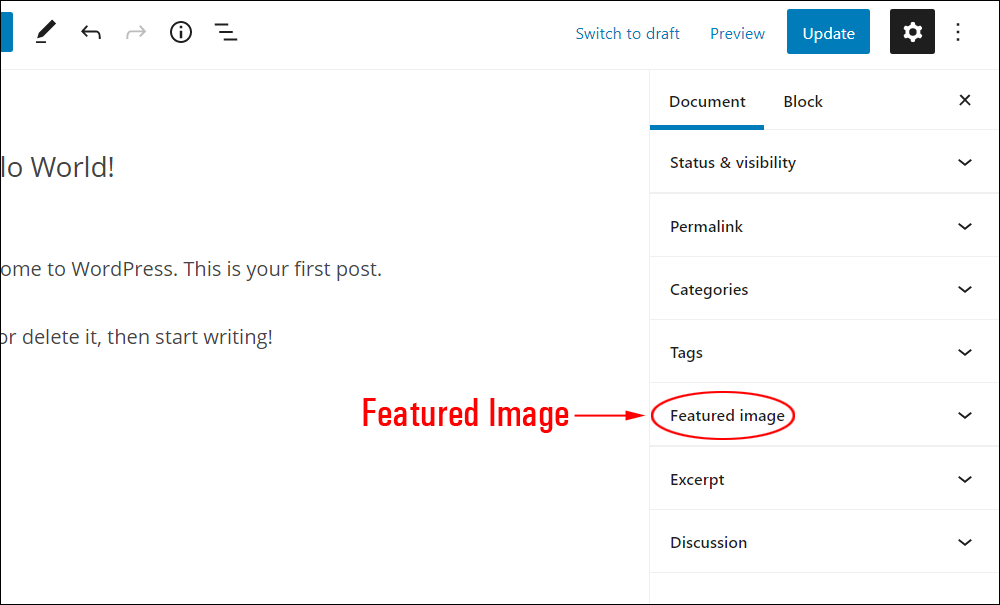
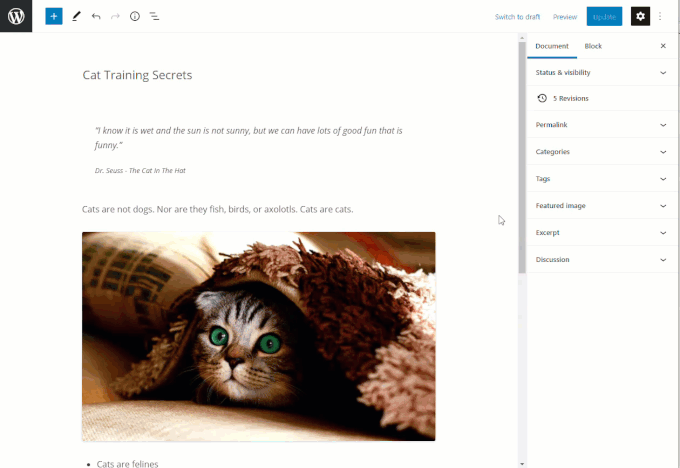
Featured Image
This section lets you add, replace, or remove a featured image on your posts and pages.
About Featured Images settings:
- You can add featured images to Posts and Pages.
- Your Theme and theme styles control how featured images display on your site.
- Featured images use images stored in your WordPress Media Library
- You can add, replace, and remove featured images from your posts and pages using the Featured Image settings section.

With the Featured Image settings section, you can select an existing image stored in the WordPress Media Library or upload an image, then select it as your featured image.
Notes:
- If your content editor’s settings section is not displaying the ‘Featured Image’ section, check that this panel is enabled in your ‘Options’ settings (More Tools & Options > Options> Document Panels).
- If you can’t see featured images displayed on your site after adding a featured image, check that:
- Your theme supports the use of Featured Images.
- Your theme’s Featured Image settings have been configured properly.
To learn more about using featured images in your posts and pages, see this tutorial: Using Featured Images In WordPress
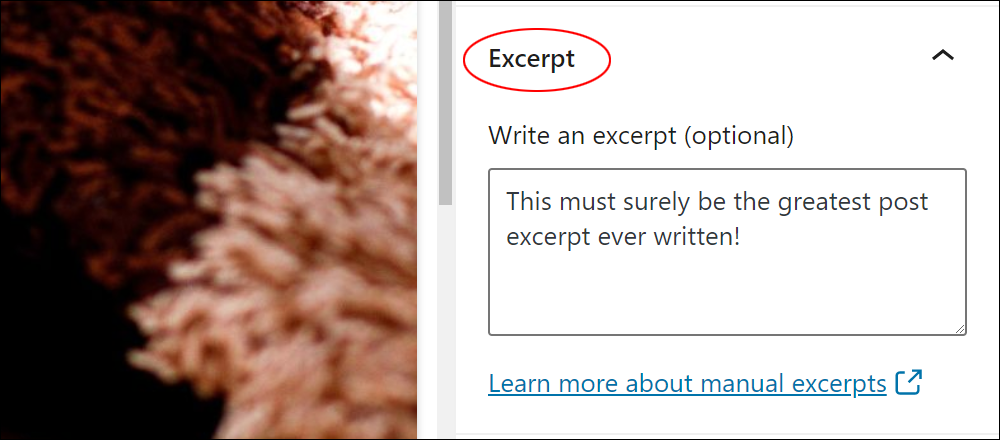
Post Excerpt
This section lets you add, edit, or delete your post excerpt.

About Excerpts settings:
- By default, Post Excerpts are a feature of WordPress Posts. You can add excerpts to Pages by installing certain plugins.
- Excerpts let you craft a concise description for your posts (e.g. add a brief “teaser”) that will display in selected areas of your website, such as your blog page, category pages, post archives pages, RSS feed, search results pages, etc.
Note: If your content editor’s settings section is not displaying the ‘Excerpts’ section, check that this panel is enabled in your ‘Options’ settings (More Tools & Options > Options> Document Panels).
To learn more about using post excerpts, see this tutorial: Using Post Excerpts In WordPress
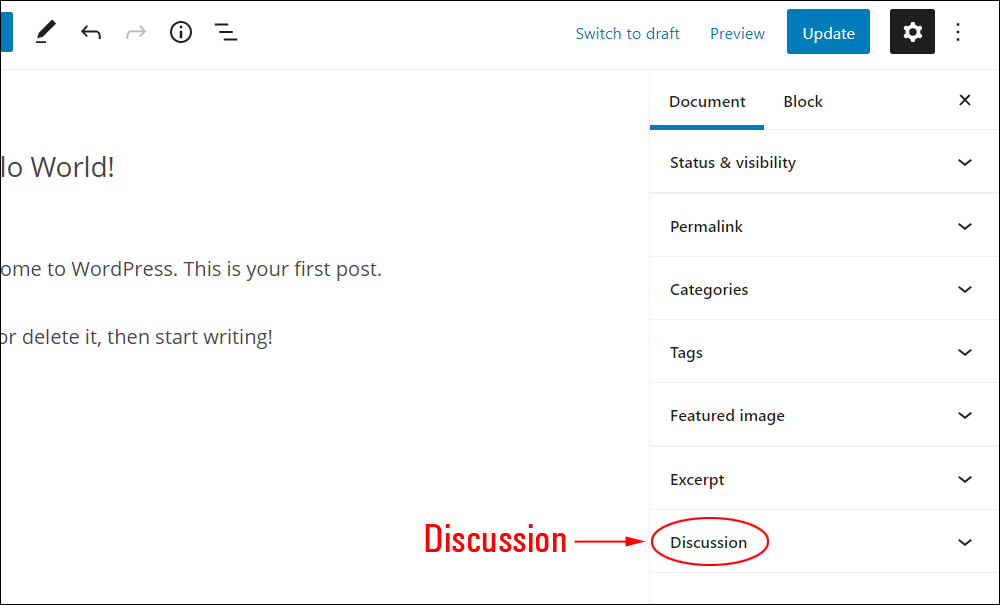
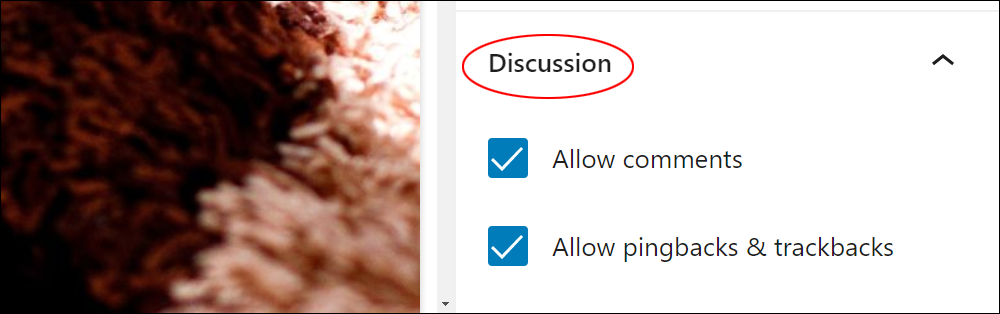
Discussion
This section lets you specify whether to allow comments, pingbacks, and trackbacks on your posts and pages.
About Discussion settings:
- WordPress provides commenting and discussion features that allow your visitors and users to engage and interact on your site. You can specify global settings for these features in your site’s Discussion Settings (Settings > Discussion) and then turn these on or off for individual posts and pages in the Discussion settings panel.
- Your site’s commenting and discussion features can be enhanced and extended using various WordPress engagement plugins.
You can allow or disallow visitors from commenting on your posts and pages, and allow or disallow Pingbacks and Trackbacks by selecting or deselecting the checkboxes in the Discussion settings panel.
Pingbacks & Trackbacks
- Trackbacks let you notify legacy blog systems that you have linked to them in your post.
- If you link to other WordPress sites or blogs, they’ll be notified automatically using pingbacks.
Learn more about WordPress trackbacks and pingbacks here: WordPress Trackbacks And Pingbacks
Note: If your content editor’s settings section is not displaying the ‘Discussion’ section, check that this panel is enabled in your ‘Options’ settings (More Tools & Options > Options> Document Panels).
Learn how to configure Discussion settings for your WordPress site here: How To Configure WordPress Discussion Settings
Learn more about managing comments on your site here: How To Manage User Comments In WordPress
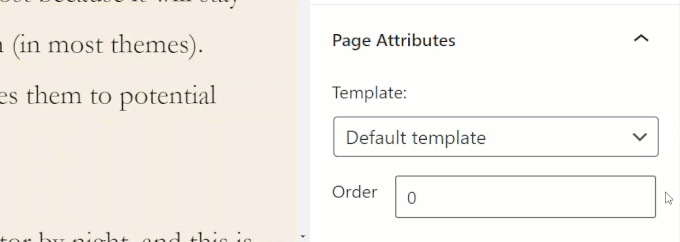
Page Attributes
As mentioned earlier, the WordPress content editor settings are the same for Posts and Pages, with some minor differences.
If you are working on a new or existing Page, you will also see a Page Attributes section in your Document settings.
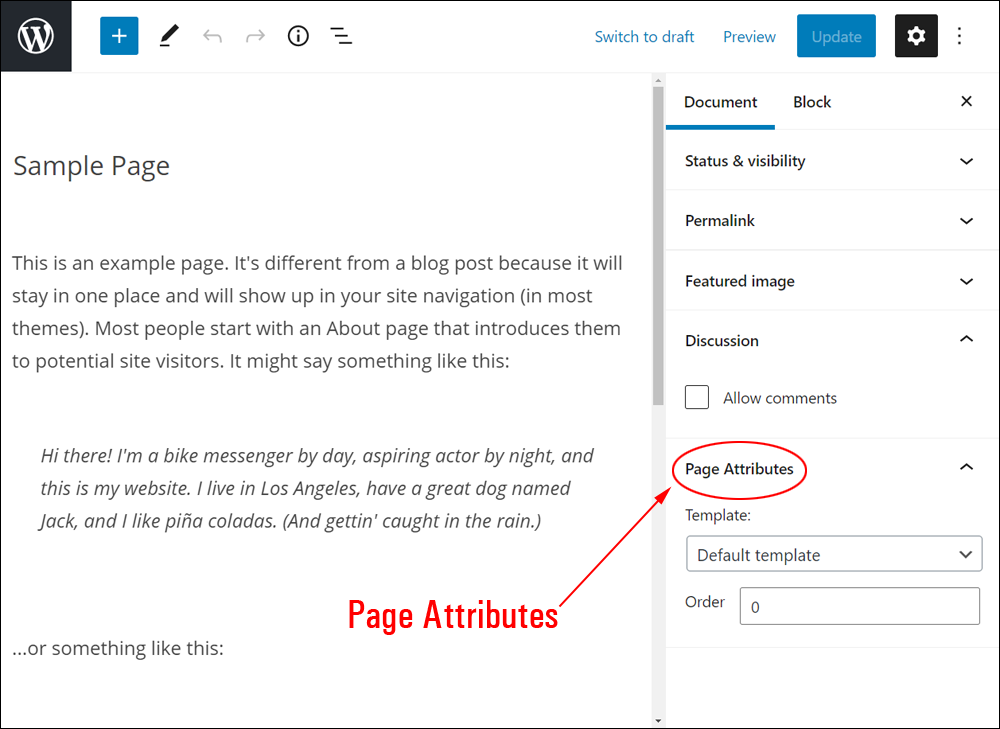
Depending on the active theme installed on your site, the ‘Page Attributes’ panel lets you configure additional options for your pages such as:
- Page Template (e.g. Full-width, Boxed-width, No sidebars, etc.)
- Parent Page (this lets you create hierarchical/nested page structures)
- Page Order, etc.
Notes:
- Installing certain plugins on your site can also enhance or extend the functionality of your Page Attributes settings.
- If your content editor’s settings section is not displaying the ‘Page Attributes’ section, check that this panel is enabled in your ‘Options’ settings (More Tools & Options > Options> Document Panels).
More Tools & Options Settings
The block content editor includes a feature called More tools & options. This section lets you access and configure a number of miscellaneous settings for your posts and pages.
To access the More tools & options settings section, click on the vertical ellipsis (three dots) icon in the Editing Toolbar.
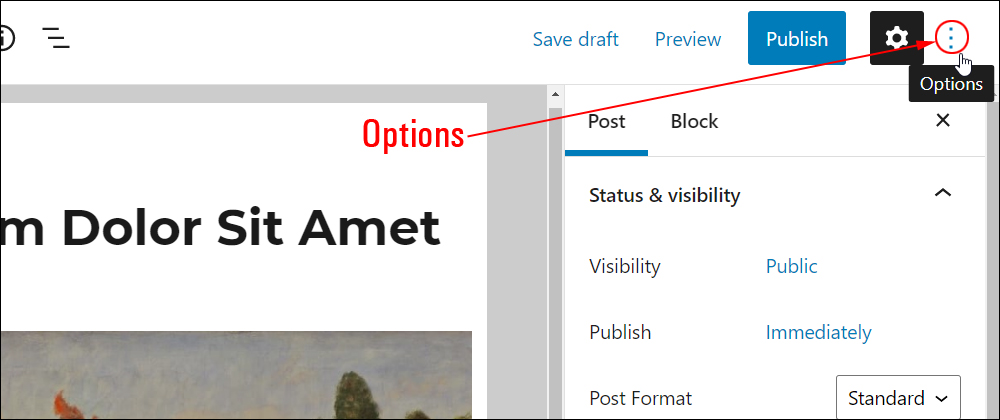
This brings up a menu with additional content editing tools and options.
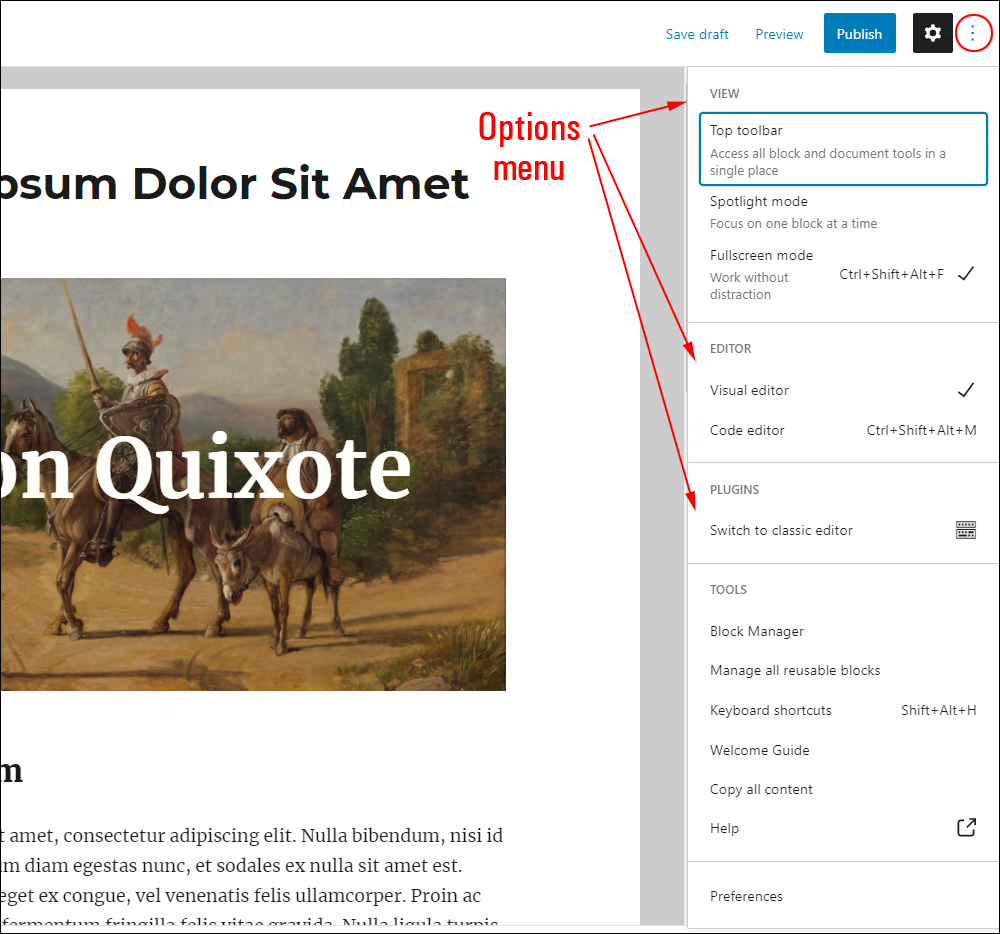
These settings are divided into the following sections:
- View
- Editor
- Tools
- Options
Let’s go through each of these sections:
View
This section lets you configure the following options to help you work more efficiently on your content:
- Top Toolbar
- Spotlight Mode
- Fullscreen Mode
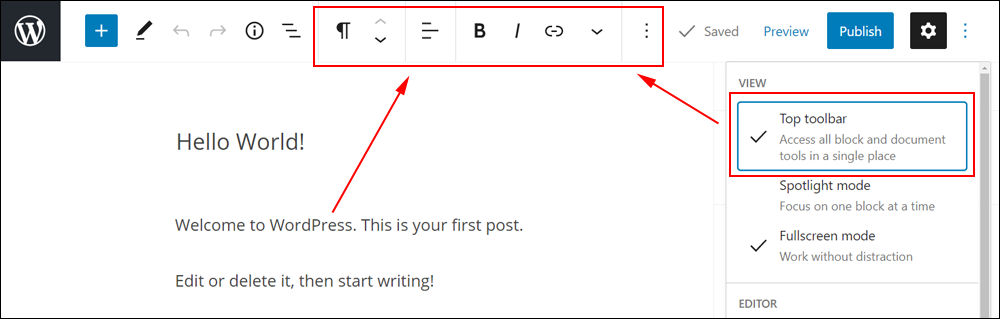
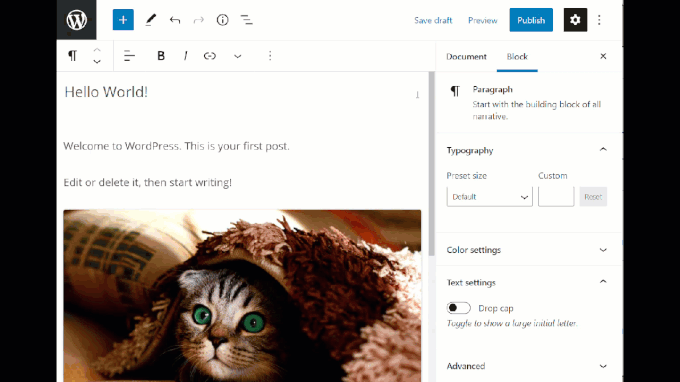
Top Toolbar
Make this section active to access all block and document tools from a single place.
To view the Block Editor settings inside a selected block, leave the ‘Top Toolbar’ option unselected.
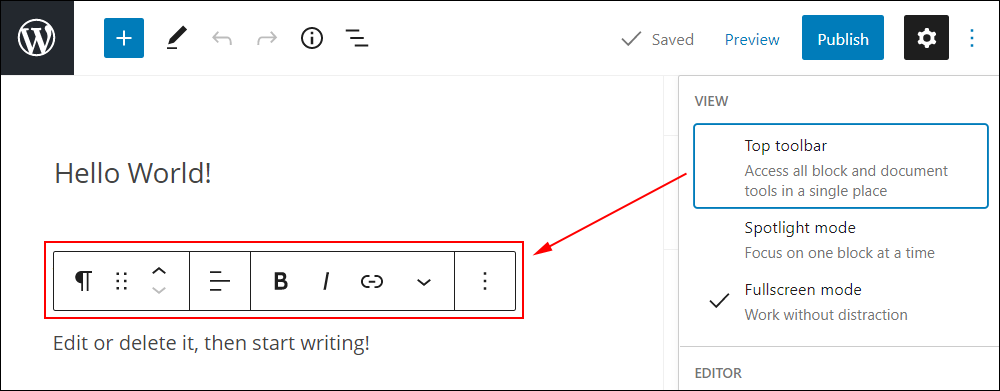
Turning on the ‘Top Toolbar’ option places the Block Editor at the top of your content editor screen.
Spotlight Mode
Spotlight Mode lets you focus on one block at a time.
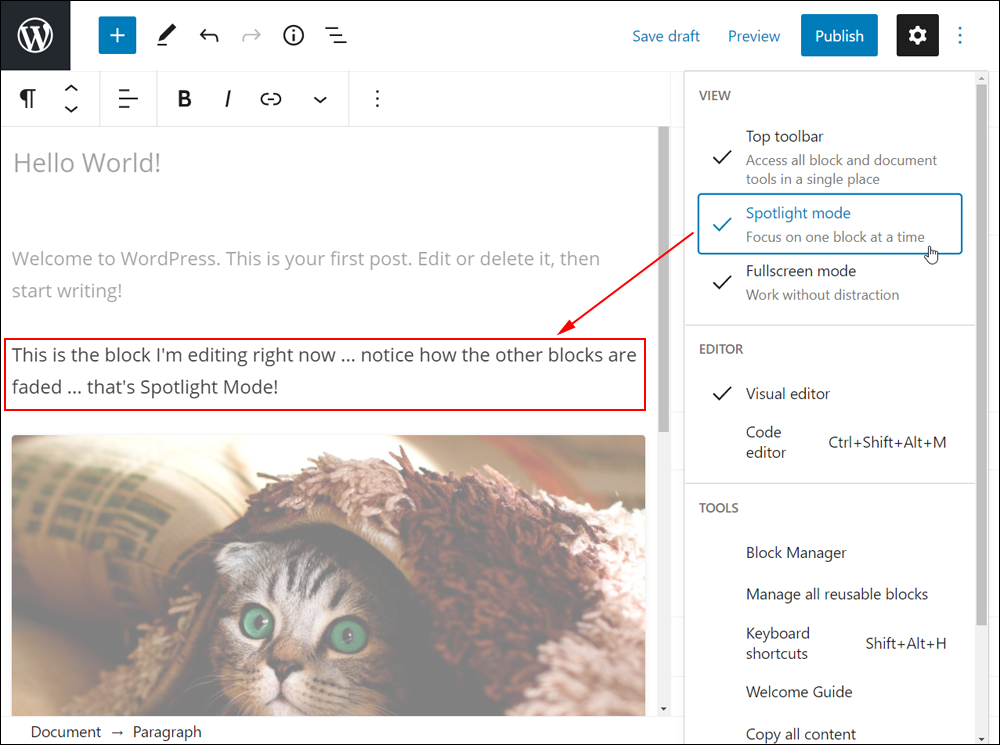
When Spotlight Mode is turned on (i.e. selected), the blocks you are not working on fade out, allowing you to focus more on the selected block.
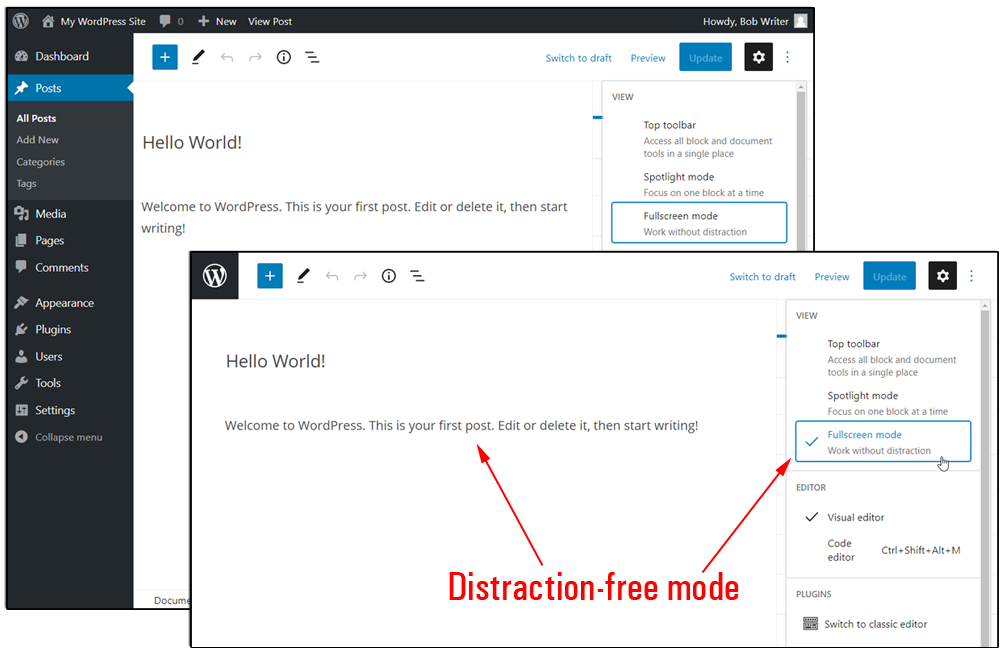
Fullscreen Mode
Fullscreen Mode lets you work without distraction by hiding the dashboard menu and Admin toolbar from the content editor screen.
Editor
The Editor section of the ‘More Tools & Options’ feature lets you choose the Editor ‘mode’ for the content editor:
- Visual Editor, or
- Code Editor
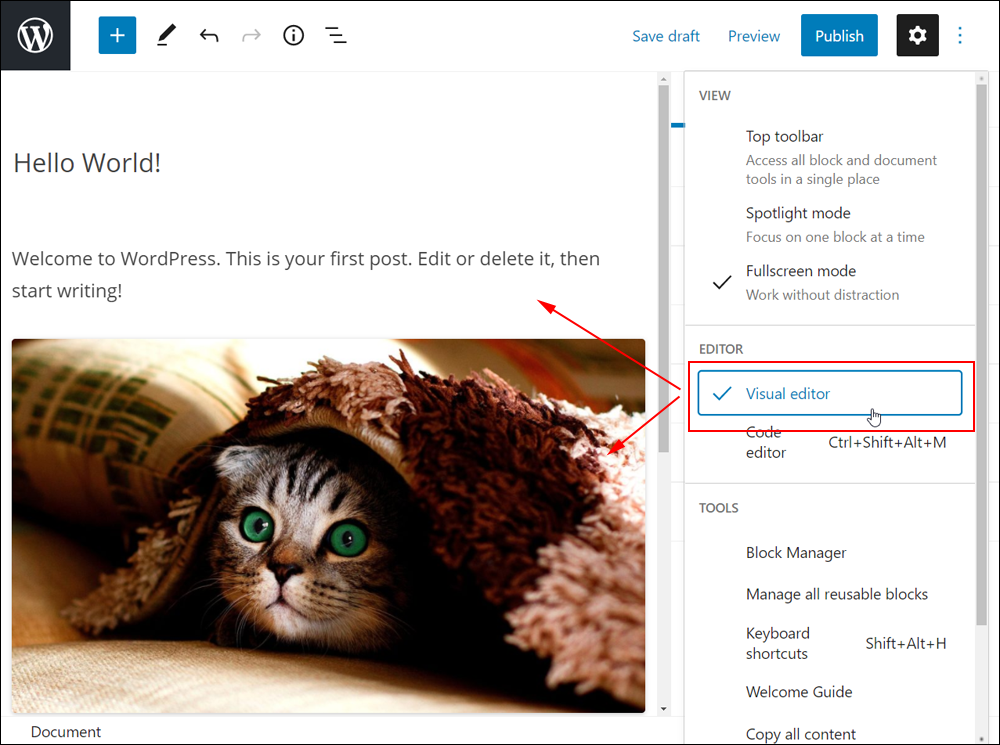
Visual Editor
Visual Editor is the default mode. With Visual Editor mode selected, the content editor lets you see and work on your content in WYSIWYG (What You See Is What You Get) format.
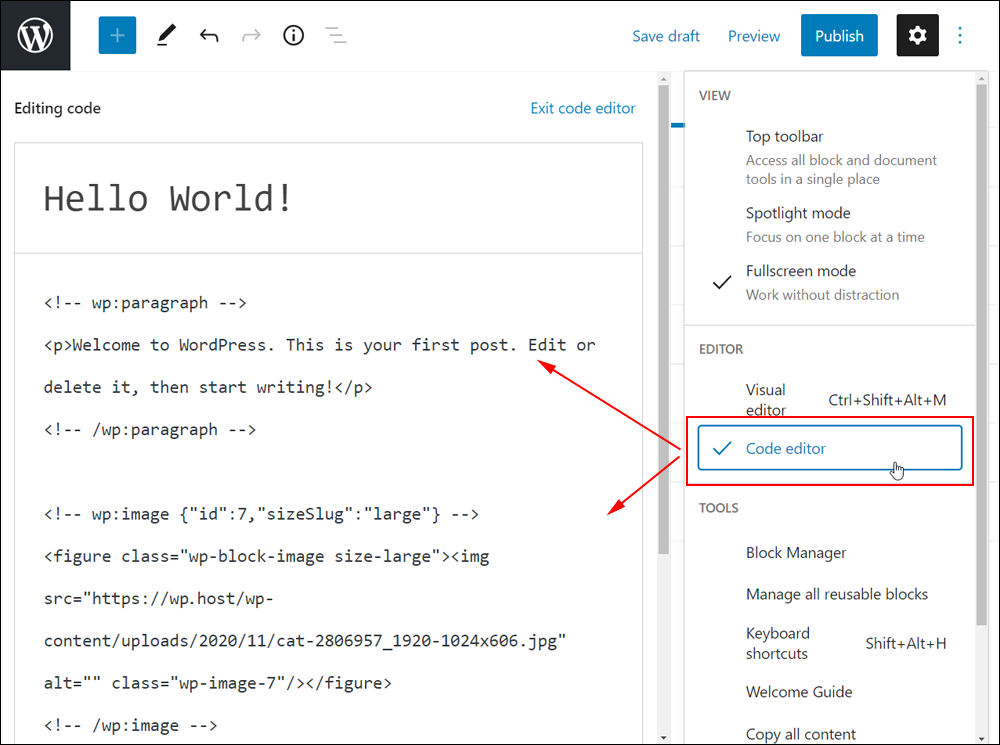
Code Editor
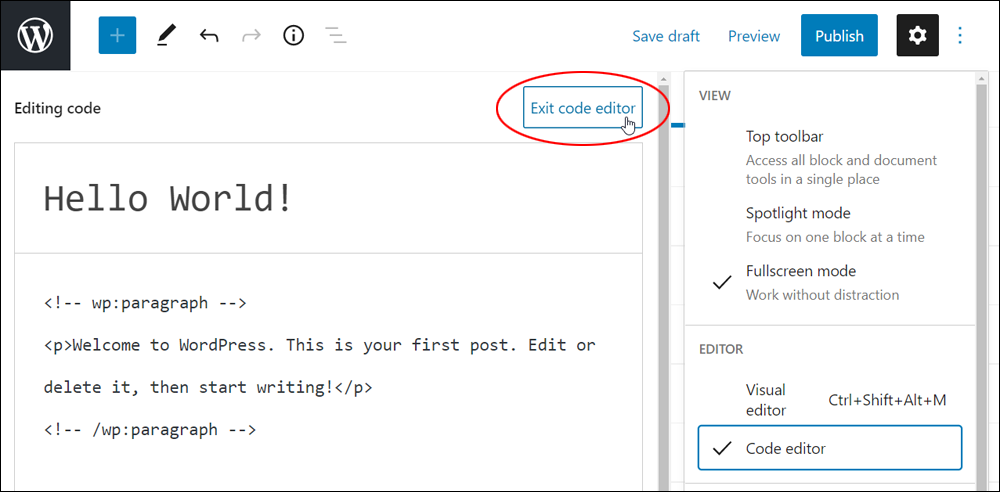
Selecting ‘Code Editor’ mode lets you work on your content with the code and HTML formatting displayed …
To switch from Code editor to Visual editor mode, click on the ‘Exit code editor’ button or select Visual editor from the ‘More Tools & Options’ menu.
You can easily switch back and forth between the Visual and Code editor modes. This is useful for things like:
- Working in Visual mode but viewing the formatting code for a section of your content when required.
- Pasting content into a block as HTML.
- Copying the content’s HTML inside a block to paste into another block or application.
![]()
Note: The Block Editor saves your content differently than the Classic Editor.
In the Classic Editor, WordPress saves all content as plain HTML. The Block Editor also saves the underlying content of your posts and pages as HTML but adds special comment tags around the content to specify the different blocks being used.
While you can still edit the HTML in the Code editor mode within the Block Editor, it’s important not to delete or edit any of the HTML comments that surround your content, as this will cause errors in your blocks when you switch back to the Visual editor mode, resulting in content not displaying correctly or even loss of content.
A safer alternative to editing the Block HTML in Code editor mode is to use the Edit as HTML option (located under the ‘More Options’ section of each individual Block).
***
Tools
This section provides various useful content editor tools and functions.
Block Manager
The Block Manager option lets you view all the active blocks installed on your content editor.
To view this list, click on the Block Manager link…

This brings up a pop-up window listing all of the blocks you have access to in your content editor.
You can scroll or search for blocks, and activate or deactivate blocks listed here.

Manage All Reusable Blocks
The WordPress block editor lets you create custom content blocks that can be reused throughout your site on other posts or pages.
This tool lets you manage all the Reusable Blocks that you have created.
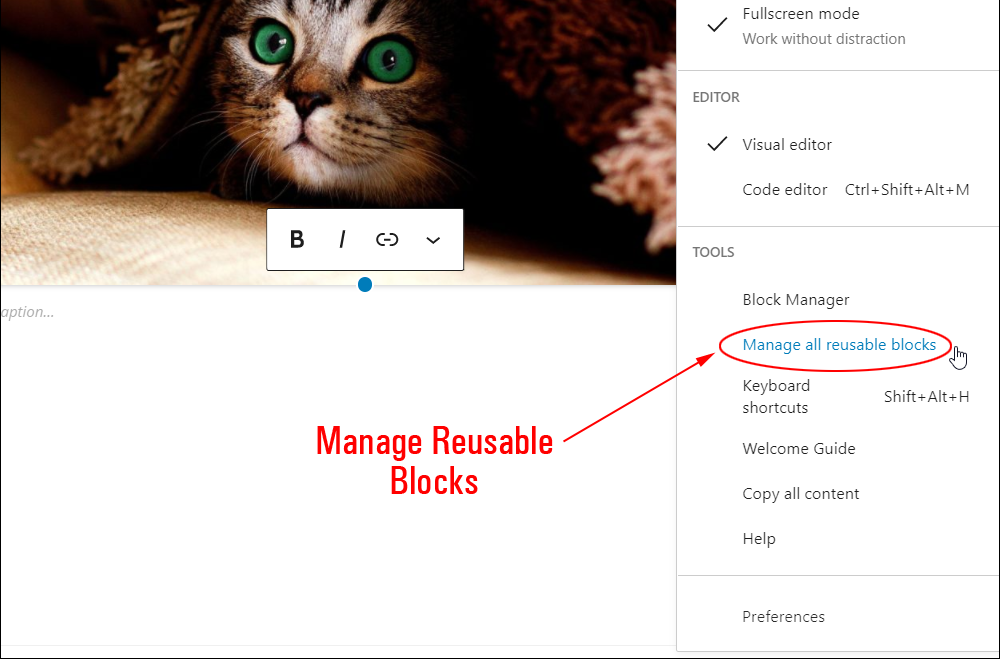
Select Tools > Manage All Reusable Blocks from the ‘More Tools & Options’ menu to bring up the WordPress Blocks library.
Here, you can view, edit, and manage all of your Reusable Blocks.
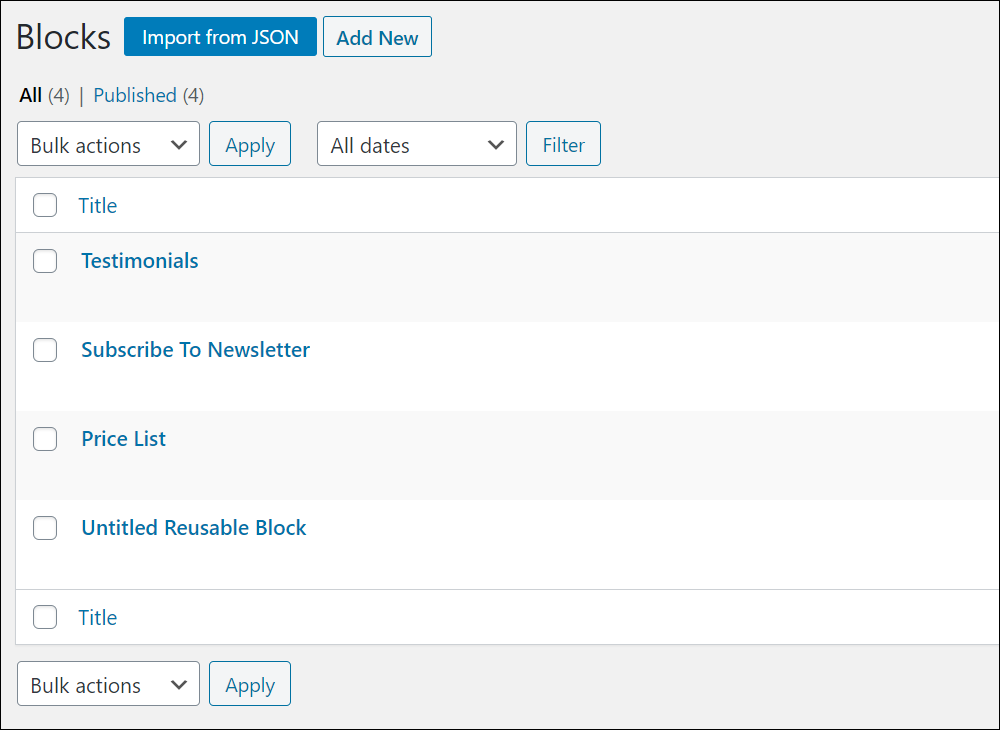
For a detailed tutorial on how to create, use, and manage Reusable Blocks, go here: WordPress Blocks – Reusable Blocks
Keyboard Shortcuts
The WordPress block content editor provides many convenient and time-saving keyboard shortcuts to help you perform certain functions faster and speed up your content editing or formatting tasks.

Selecting Tools > Keyboard Shortcuts from the ‘More Tools & Options’ menu brings up a list of all the keyboard shortcuts you can use when working in the block editor.
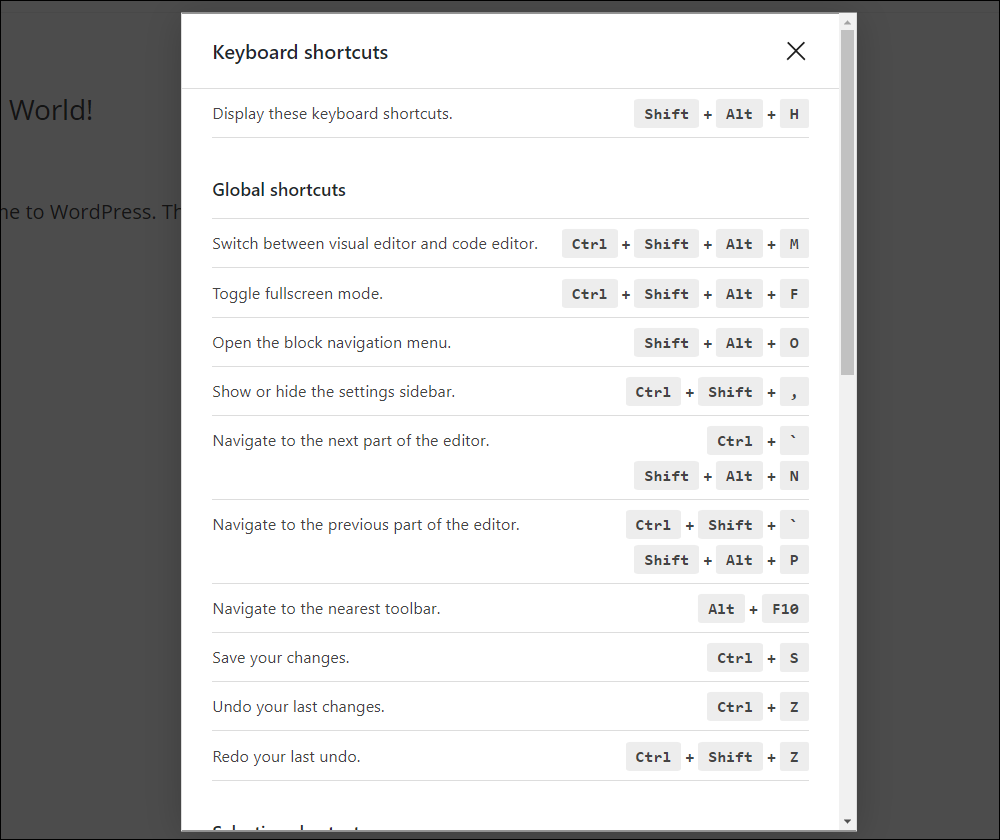
Quite appropriately, you can also bring up the list of keyboard shortcuts when working in the block editor using keyboard shortcuts.
Type in Alt + Shift + h (Windows) or Option + Control + h (Mac) to bring up this list.
For more details, see this tutorial: WordPress Content Editor – Keyboard Shortcuts
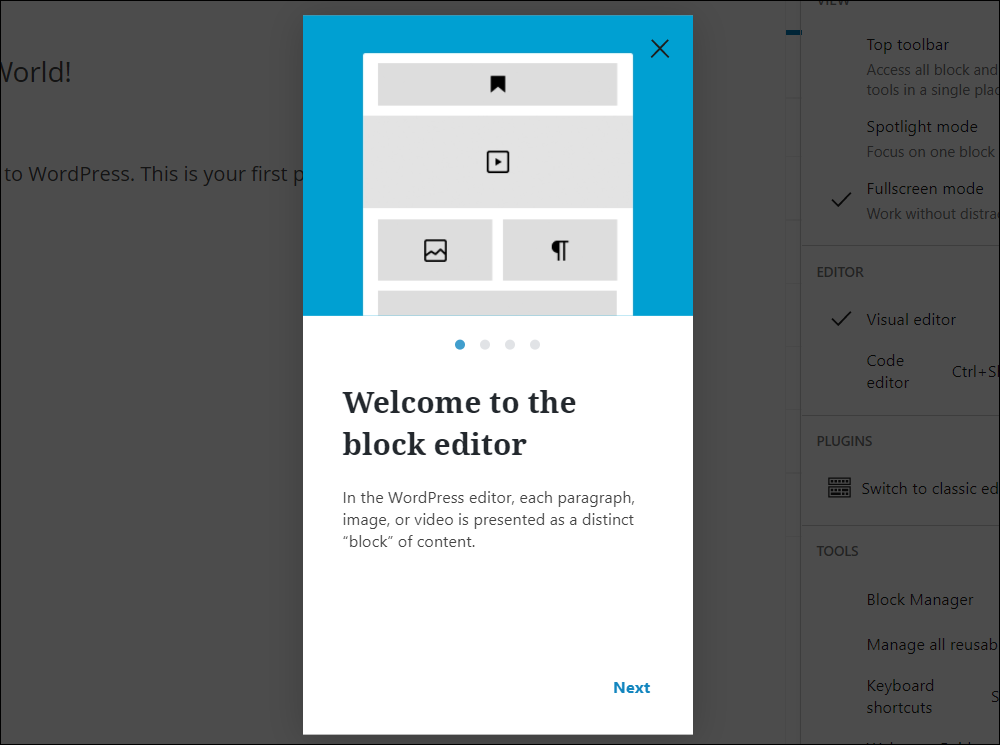
Welcome Guide
WordPress provides a built-in Welcome Guide giving new users a brief tour of the Block Editor.

Click on the Welcome Guide link to bring up this feature.
Copy All Content
This tool lets you copy everything in your Content Area to your clipboard.

To use this tool, click inside any block in the Content area, select the ‘More Tools & Options’ menu, and click on ‘Copy All Content’.
All content will be selected and copied to your clipboard.
![]()
To copy all content from an existing post or page and paste into a new post or page:
- Click inside any block in the Content area
- Select the ‘More Tools & Options’ menu
- Click on ‘Copy All Content’
- Create a new post or page
- Add a new block to the Content area
- Select ‘Code Editor’ mode (‘Tools’ > ‘Editor’ > ‘Code Editor’)
- Click inside the new block and paste your content
- Select ‘Visual Editor’ mode (‘Tools’ > ‘Editor’ > ‘Visual Editor’)
- All content will be copied from your previous post or page.
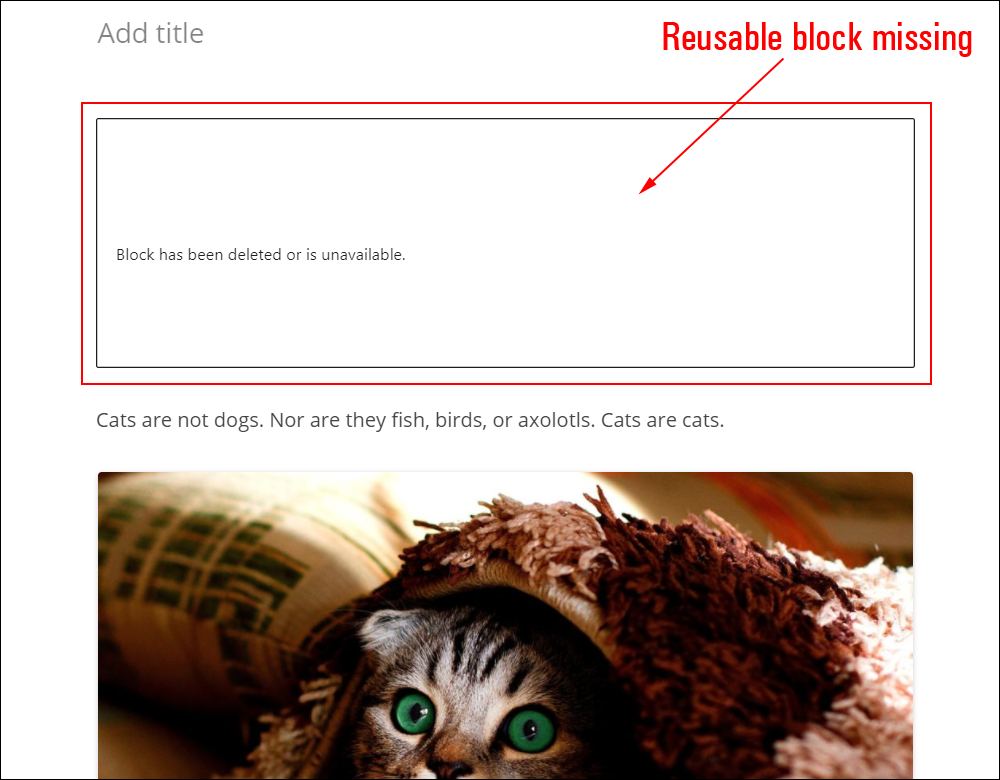
Note: If you paste content from one site to another, you may see errors if the pasted-in content contains custom blocks (e.g. Reusable blocks).
For example, you may see the message “Block has been deleted or is unavailable.”
Help
Click on the Help link in the More tools & options menu…

…and you will be taken to the section of the official WordPress site for the Block Editor.
Preferences
This section provides a number of additional options for the content editor.
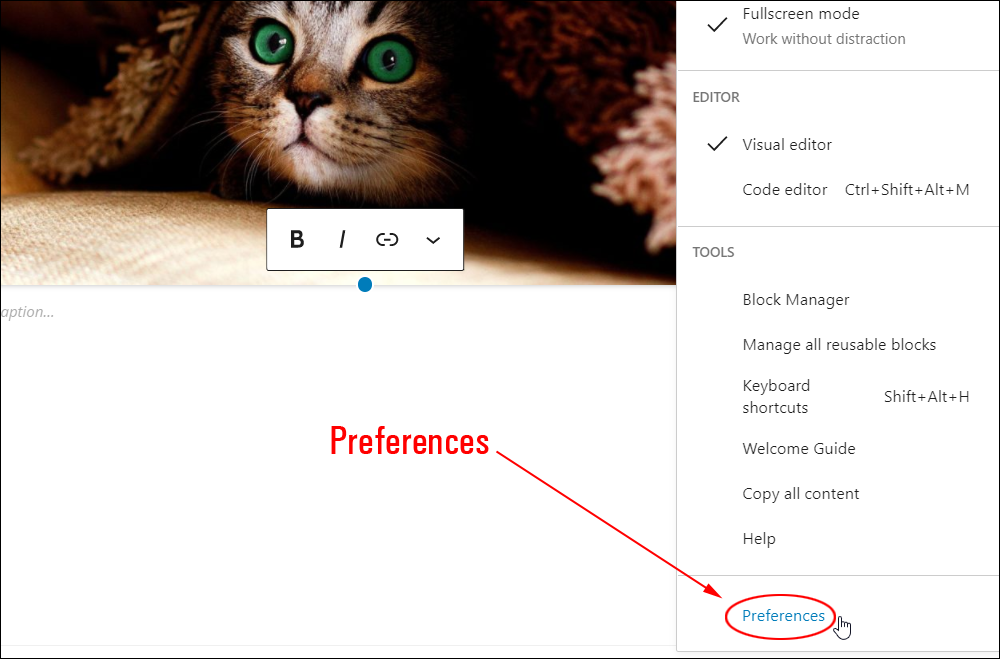
The features in this section can be turned on or off by selecting or deselecting various options.
Click on the Preferences link in the ‘More Tools & Options’ menu to enable or disable your post or page options.
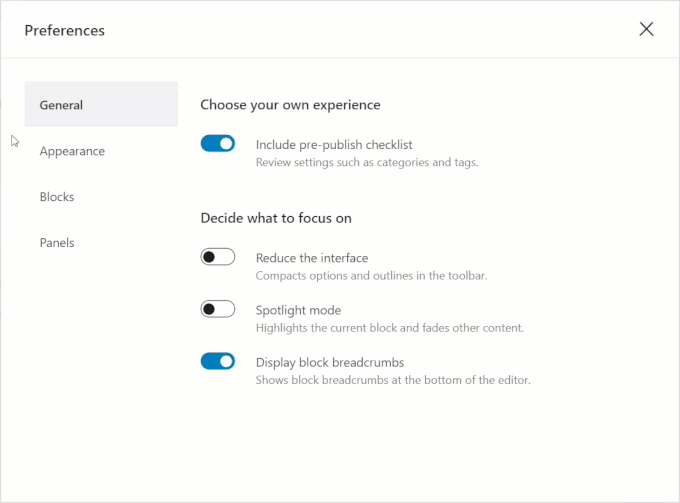
General
- Enable pre-publish checklist: Displays a pre-publish checklist and reminders to review settings such as categories and tags before publishing your post/page.
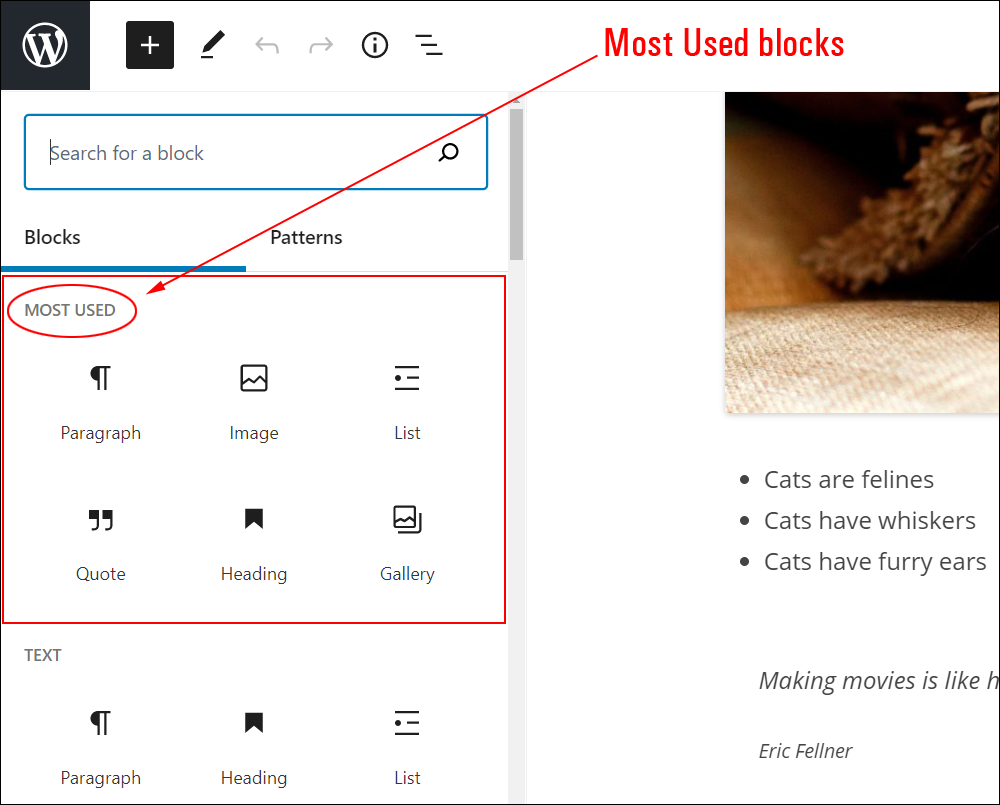
- Show most used blocks: Places the most frequent blocks in the block library and displays these under the Most Used Blocks category in the Add Block tool.
Keyboard Options
- Contain text cursor inside block – Aids screen readers by stopping text caret from leaving blocks.
Appearance
Enable or disable default preferences for various appearance settings.
- Reduce the interface: Compacts options and outlines in the toolbar.
- Spotlight mode: Highlights the current block and fades other content.
- Display button labels: Shows text instead of icons in the toolbar.
- Use theme styles: Make the editor look like your theme.
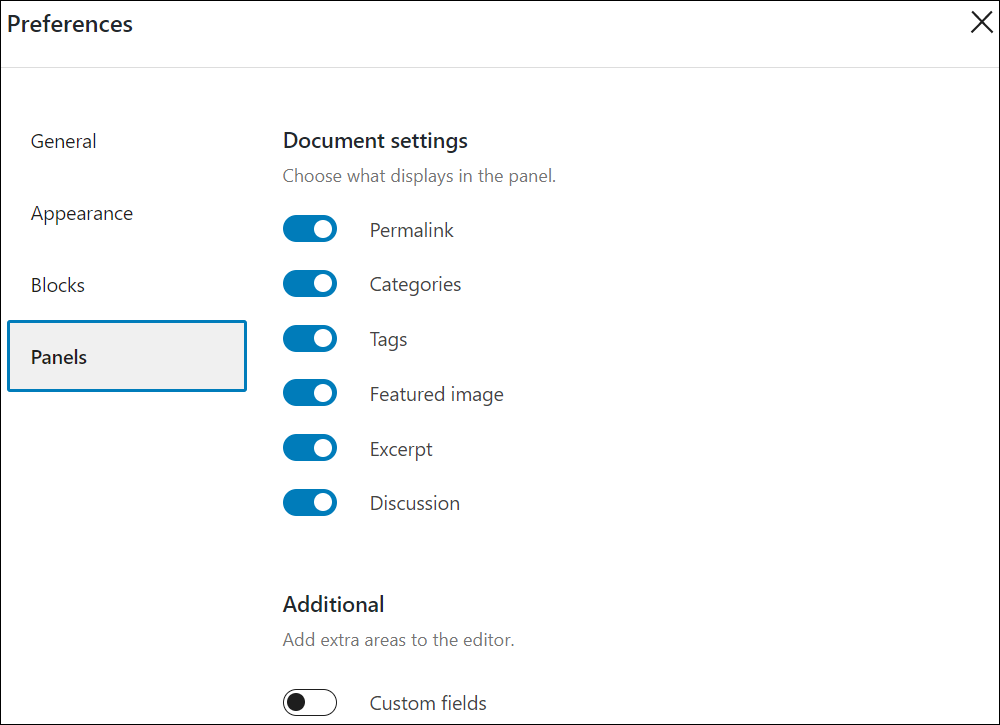
Document Panels
Select or deselect the options in this section to choose which panel to display or hide in your content editor.
- Permalink (Posts & Pages)
- Categories (Posts only)
- Tags (Posts only)
- Featured Image (Posts & Pages)
- Excerpt (Posts only)
- Discussion (Posts & Pages)
- Page Attributes (Pages only)
Advanced Panels
- Custom Fields – Select or deselect options in this section to display or hide custom fields. Note: If you enable this, you will need to reload your page for the change to take effect. Make sure your content is saved before reloading.
Congratulations! Now you know how to use the WordPress block editor settings section!
For more tutorials about using the block editor, go here:
-
-
- The WordPress Block Editor (Gutenberg)
- How To Use WordPress Blocks
- How To Use The WordPress Block Editing Toolbar
- How To Use The WordPress Block Editor Content Area
- How To Use The WordPress Block Editor Settings Section (this tutorial)
-
***

***
"If you're new to WordPress, this can stand on its own as a training course and will stay with you as you progress from beginner to advanced and even guru status." - Bruce (Columbus, Ohio)
***
We are not affiliated, associated, sponsored, or endorsed by WordPress or its parent company Automattic. This site contains affiliate links to products. We may receive a commission for purchases made through these links.