 You have no doubt heard that people generally buy from businesses they know, like and trust.
If you are looking for quicker, simpler and cheaper ways to sell more products or services online, then something you can do, is help your prospects get to know you and your business better.
Adding a ‘Meet Our Team’ directory to your website will help to humanize your organization.
In this step-by-step tutorial, we show you how to create and add an easy-to-manage list of employees to your web site using a free WP plugin.
How To Easily Add An Employee Directory To Your Site: Step-By-Step Tutorial
In this tutorial, we will install, activate and configure a WordPress plugin called Simple Staff List.
Simple Staff List – WordPress Plugin
(Simple Staff List Plugin For WordPress)
Simple Staff List is free and lets you easily staff.
The first step is to install and activate the plugin.
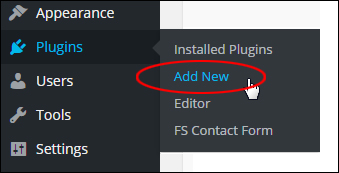
Log into the admin and from the admin menu, select Plugins > Add New …
(WP Plugins Menu – Add New)
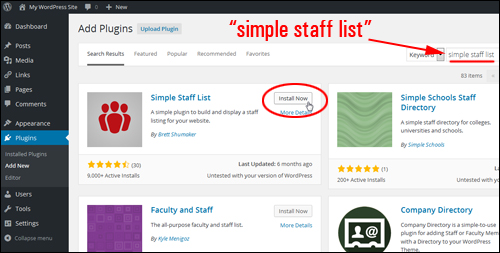
In the Plugins screen, search for “simple staff plugin”. This will bring up the Simple Staff Plugin in your plugin search results.
Click on the Install Now button …
(Plugins – Add Plugins screen)
Click the Activate Plugin link …
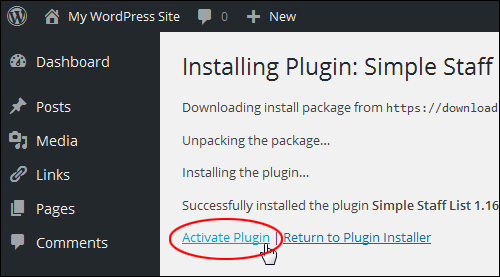
(Activate plugin)
After installing and activating the plugin, you will see that a new menu entry will appear on the WordPress menu called Staff Members …
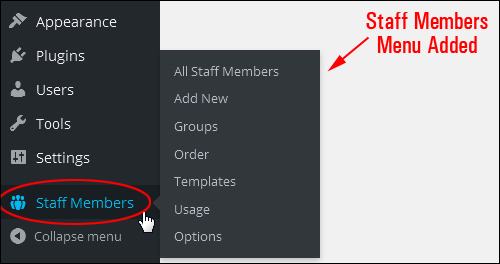
(Staff Members)
All of the options and settings for the Simple Staff List plugin are configured and managed from the Staff Members menu.
How To Configure The Plugin
Depending on the size of your business and how you want to structure your directory, you could begin adding new staff members after installing the plugin, or create several groups (i.e. categories) that you will assign to your members.
Staff Members – Groups
To configure your groups go to your WordPress dashboard menu and choose Staff Members > Groups …
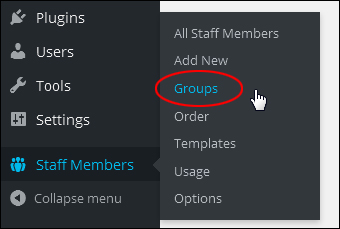
(Staff Members Menu – Groups)
The Groups panel …
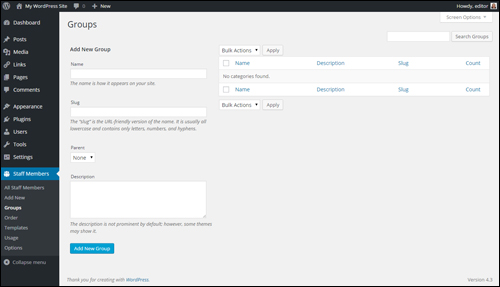
(Groups screen)
![]()
Note: Setting up groups is similar to working with WordPress categories …
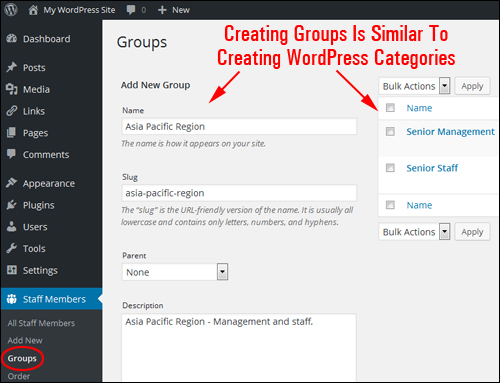
(Groups are like categories)
Add a new group by typing in the following information:
- Group Name – Enter your category name here
- Slug – Enter the slug of your group name. Note: make sure that all letters are in lower case and use hyphens instead of spaces.
- Parent – Use this section if you plan to set up nested categories
- Description – Type in a group description
- Click Add New Group when done to set up a new directory category …
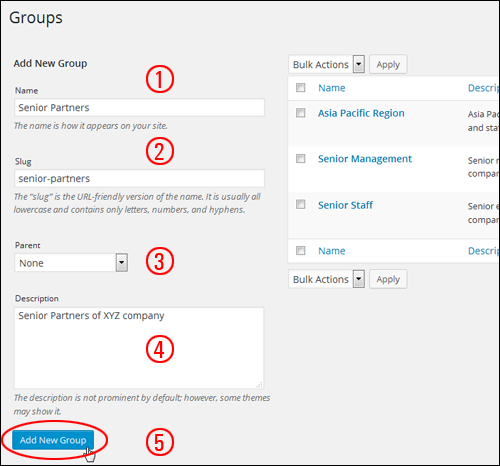
(Groups settings area)
If you run a medium to large organization, having the ability to create groups can be very useful. For example, you can create groups for founders, project teams, departments, etc.
Create as many groups and nested groups as you need by adding new Groups and then using the Parent drop-down menu to organize these into a directory hierarchy …
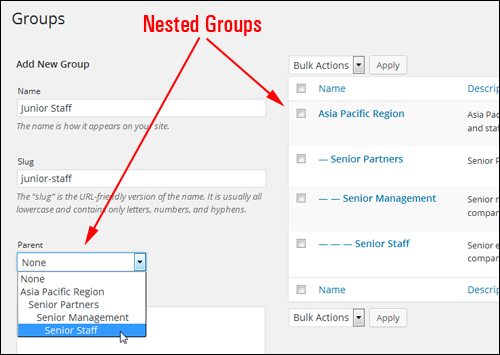
(Nested categories)
Remember to click on the Add New Group button after creating each new item …
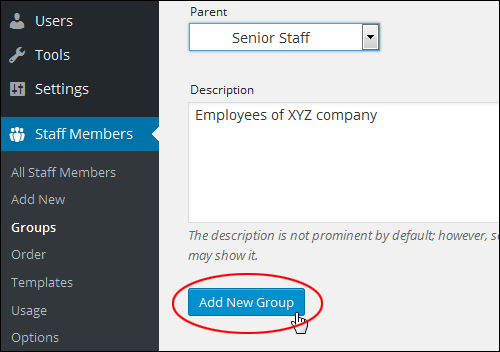
To change or reassign Groups for individual entries, hover over a category title and click on the Edit link …
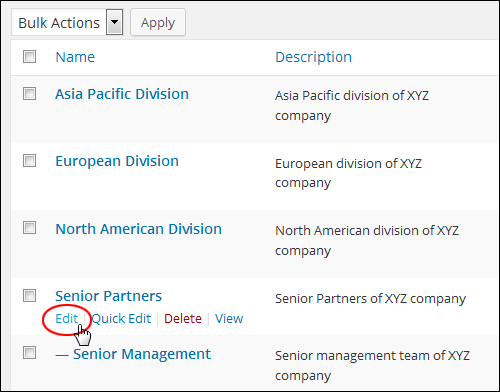
The group details will open in the Edit Group page. Select a new parent group category from the Parent dropdown menu …
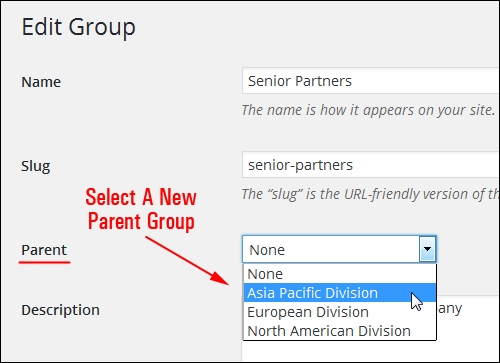
(Edit Group settings)
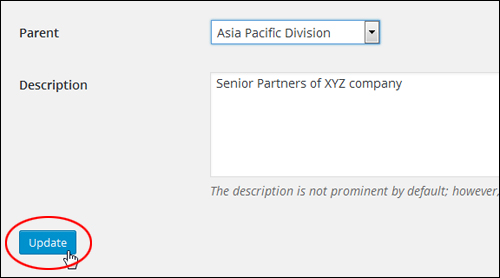
Click Update to save your changes …
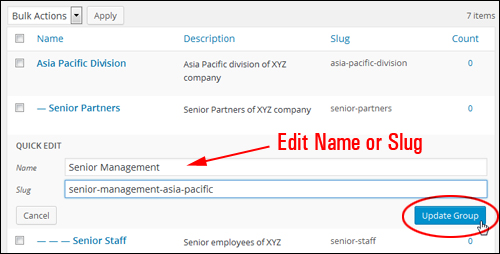
To edit your Group name or slug, hover your mouse over the group name and select the Quick Edit menu feature …

Click Update Group to save your changes …
Continue adding categories to this section until you have created your directory structure …
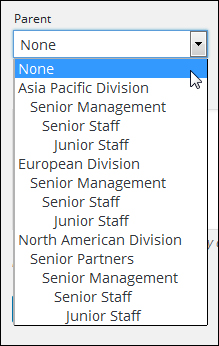
You can add as many nested categories as you like …
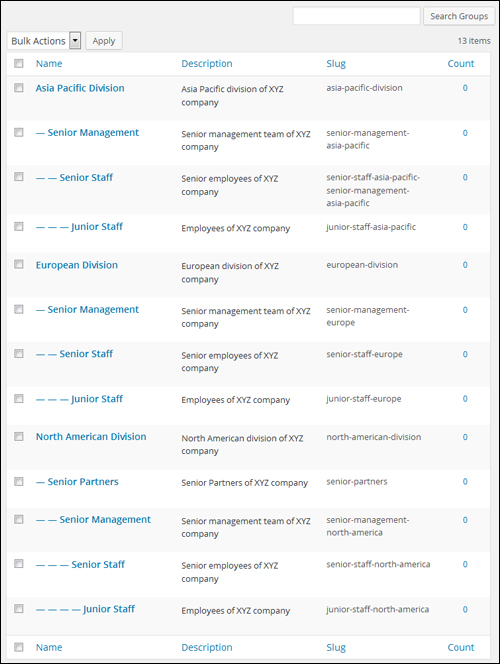
(Add nested categories your directory)
Once you are done setting up your groups, you can start adding staff details to your directory.
Staff Members – Add New
From your WordPress admin menu, select Staff Members > Add New …
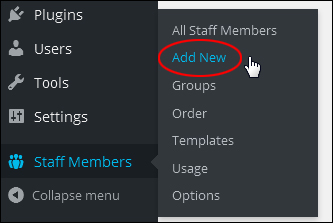
(Staff Members Menu – Add New)
The Add New Staff Member settings …
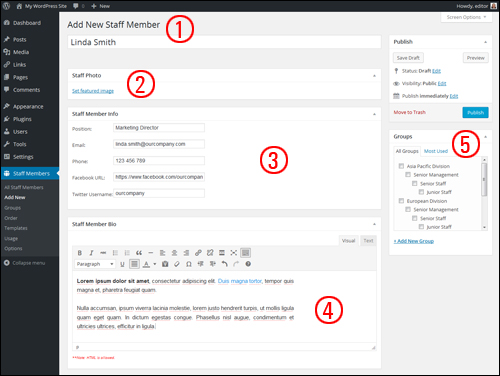
(Add New Staff Member settings)
This area provides you with an easy-to-use interface for adding your staff member information and includes the following fields:
Name Section (1)
- Name: Your staff member’s name
- Permalink: Change each staff members’ permalink URL (you will see this section after your first save).
Staff Photo Section (2)
- Photo: Upload a photo here
Staff Member Info Section (3)
- Position: Enter the person’s role here
- Email: Your staff member’s email address
- Phone Number: Your employee’s phone number
- Facebook URL: Add the employee’s Facebook address into this field (note: use the full URL, e.g. http://www.facebook.com/username)
- Twitter URL: Add the person’s Twitter username (note: only enter the username, not the full twitter URL)
Staff Member Bio Section (4)
- Staff Member Bio: Type in a profile description for your employee here. As this uses the built-in WordPress Text Editor, you can add formatting to the content entered into this section.
Groups Section (5)
- Groups: Assign your employee to a group (see above to learn how to set up your groups).
![]()
Click on the Screen Options tab …
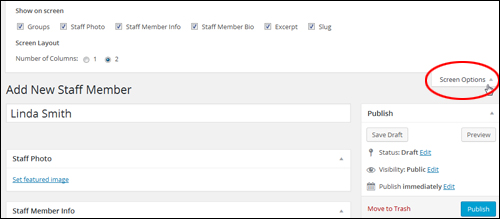
(Screen options)
You will see options to enable additional features …
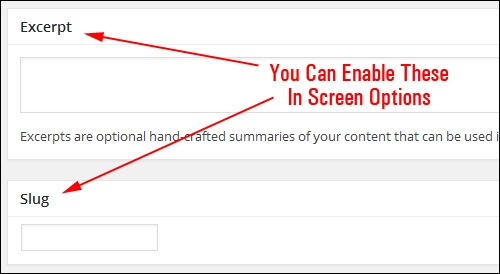
(Enable additional fields in screen options)
Now that you know what each section does, enter your staff member’s details …
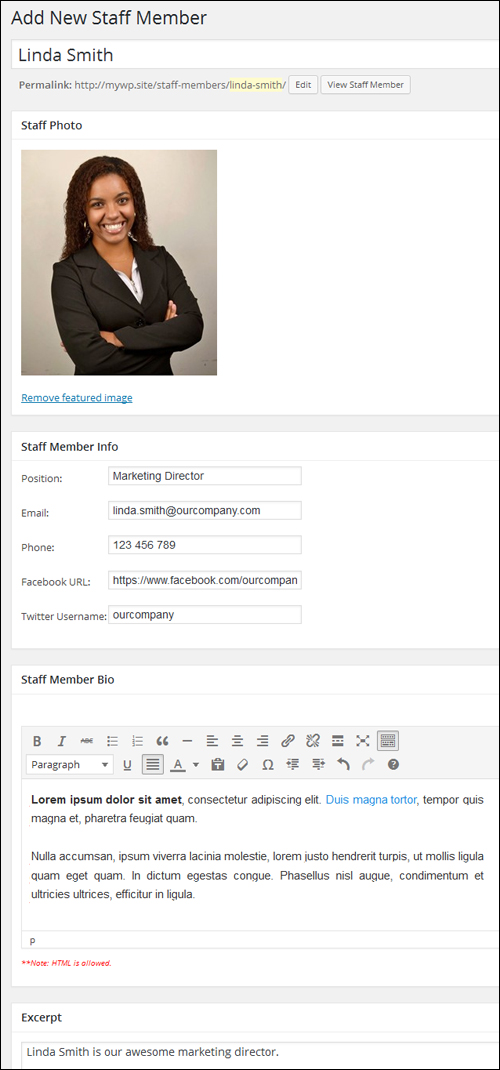
(Add New Staff Member fields)
Once you have entered details, assign the new item to a directory group in the Groups box located in the sidebar …
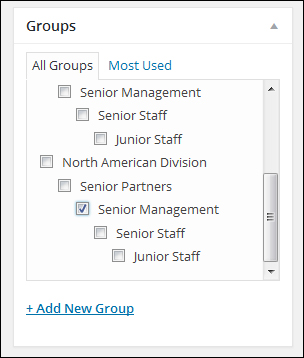
(Groups section)
Note: If you have not set up categories before adding staff member details, you can add a new group by clicking on Groups > + Add New Group …
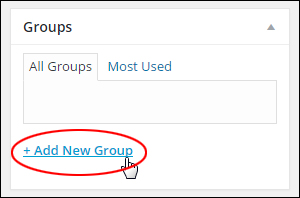
(Groups > + Add New Group link)
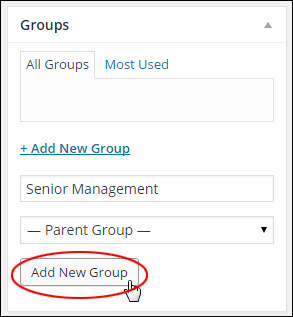
A field for entering your group name will display, with a drop-down menu to assign your new entry to a parent group. Enter your new directory category and click on the Add New Group button …
The new category will be added. Remember to tick the check box to assign your list entry to the group …
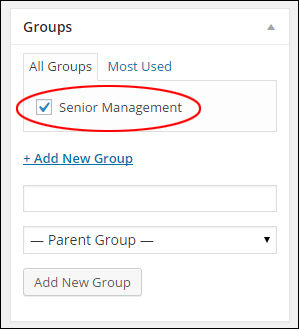
(Groups box)
![]()
Note: Groups cannot be edited when a staff member’s details are being added or modified. To edit an item, go to the Groups section of the plugin’s settings (see “Groups” section above for details).
***
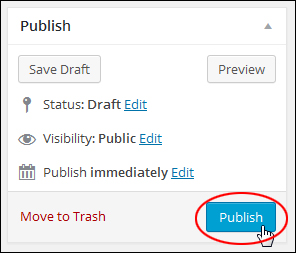
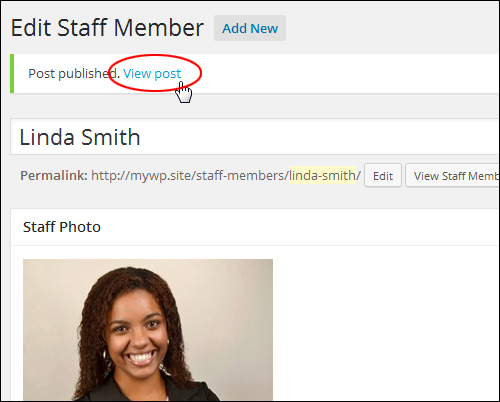
After typing in the person’s details, click the Publish button to add them to your directory …
Click View Post …
You can update your employee’s profile by clicking the Edit Staff Member link in the WP admin toolbar …
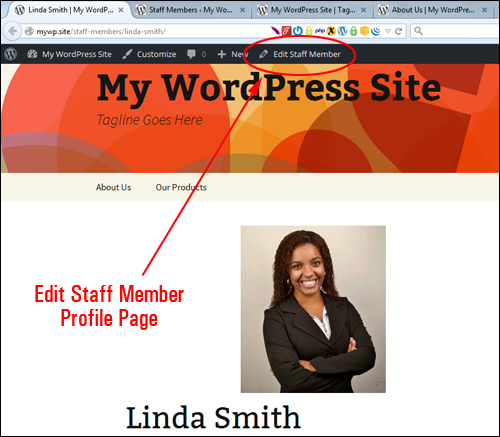
(Edit Staff Member link – WP admin toolbar)
![]()
For a detailed tutorial on using the dashboard admin toolbar , go here:
Note: If you have set up groups and get a page error like the one shown below, check that you have correctly configured your site permalinks …

(Check your permalinks if you get errors)
If you need help setting up WP permalinks, see this step-by-step tutorial:
Repeat the above process to add new entries to your employee directory directory.
Staff Members – All Staff Members
After entering employee details to your directory, you can view and edit their details by clicking Staff Members > All Staff Members in your menu …
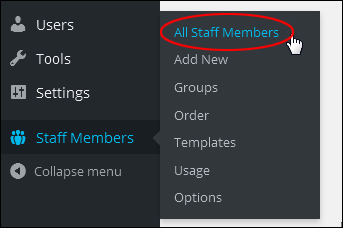
(Staff Members Menu – All Staff Members)
This brings up a table listing all the listing entries and any details you have added with each entry …
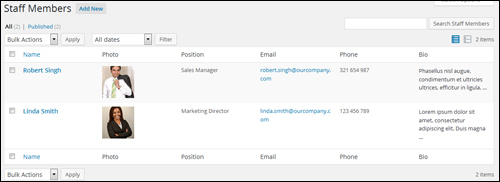
(Staff Members details list)
If you need to edit an individual’s details, hover over their listing, and a submenu will appear.
Click on Edit to edit the item’s Staff Bio, or Quick Edit to update details like name, slug, group, and publish status. You can also delete a member from the employee directory by clicking on the Trash link, or view the entry on your site by clicking View …
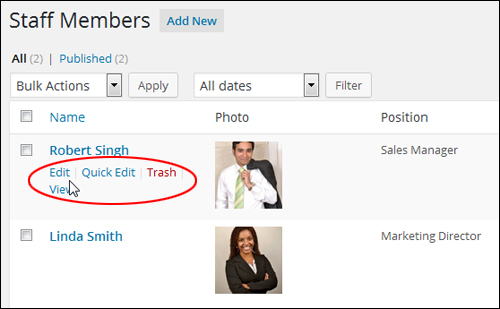
(Edit Staff Members profile details)
If you have many names to add, your table can become unwieldy.
Use the Search Staff Members search field to locate entries …

(Search Staff Members search field)
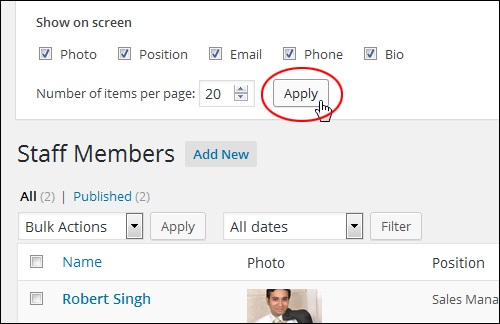
You can specify which fields to display in this section. To hide or hide fields on your screen, click on Screen Options …

(Screen Options tab)
Tick or untick the checkboxes to show or hide specific fields. You can also specify how many staff members are listed per page. Click Apply when finished to save your settings …
Staff Members – Order
The Simple Staff List plugin also features a drag-and-drop interface that allows you to arrange the order that listings appear on your directory pages.
Choose Staff Members > Order on the main admin menu …
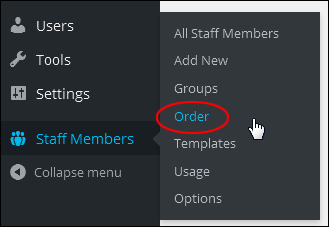
(Staff Members Menu – Order)
To rearrange the order of your listings, click and drag the entry to the desired location …
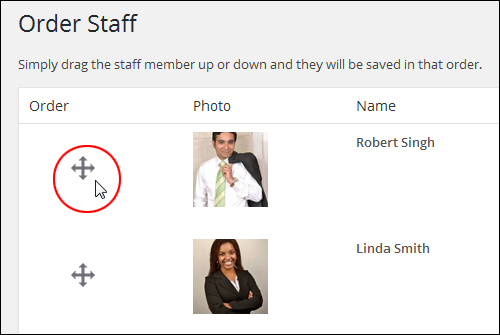
(Rearrange listings using drag and drop)
Your staff list will be automatically rearranged …
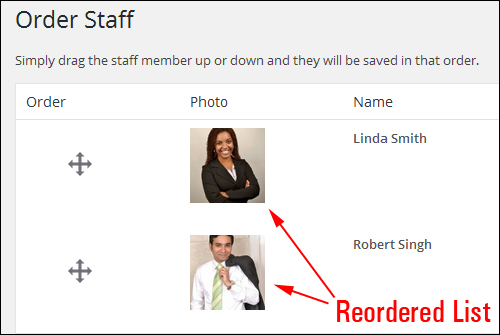
(Reordered list)
Once you have added employees’ listing details to your directory, the next step is to add your directory to your site visitors.
Staff Members – Order
Simple Staff List also features a drag-and-drop interface allowing you to specify the order in which entries appear on your directory pages.
Choose Staff Members > Order in your menu …

(Staff Members – Order)
To rearrange the order of your entries, click and drag the item to the new location …

(Reorder listings using drag and drop)
Your staff list will automatically be reordered …

(Reordered list entries)
After adding your staff listing details to your directory, the next step is to display the directory on your site.
Simple Staff List – Additional Notes
Simple Staff List also lets you edit the style and layout of your staff directory listings using template tags and CSS (Cascading Style Sheets).
Templates Menu
To customize the style and layout of your directory, select Staff Members > Templates from your menu …
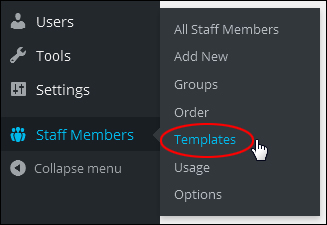
(Staff Members Menu – Templates)
This opens the Templates screen …
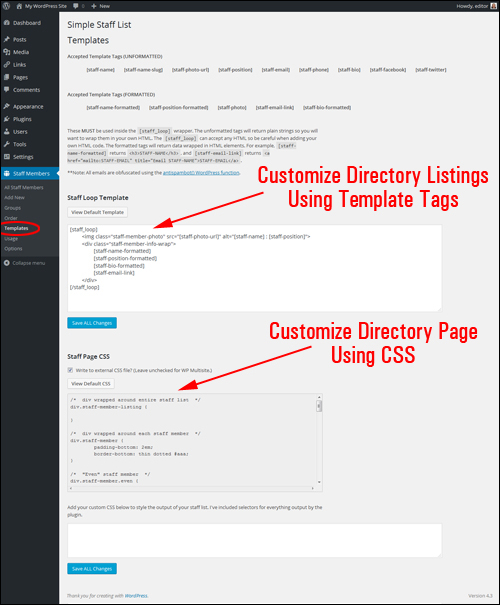
(Templates screen)
To customize your directory listings, insert any of the permitted template tags inside the [staff_loop] [/staff_loop] code.
For example, below is the default template used for displaying directory listings …
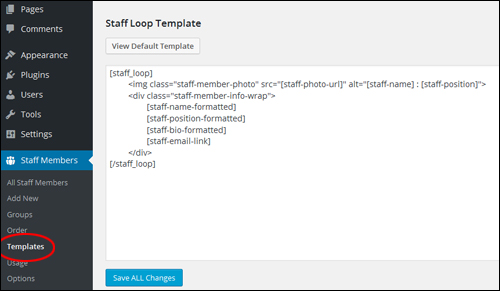
(Default Plugin Template)
The above code displays the listing shown below …
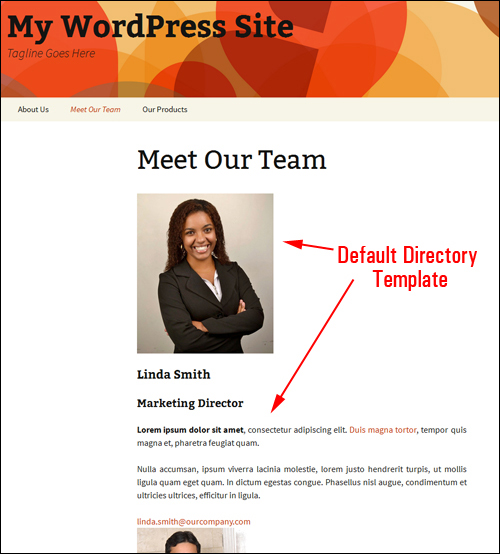
(Default Plugin Staff Loop Template Listing)
Notice that no Facebook or Twitter URLs are showing in the above example. To display these fields, you will need to include the [staff-facebook] and [staff-twitter] template tags, as shown in the screenshot below …
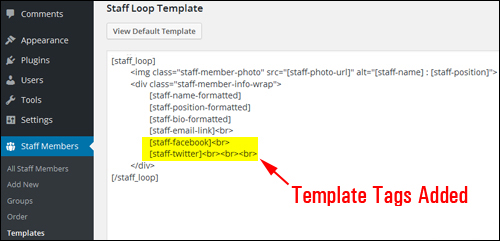
(Template tags added to Staff Loop Template)
Your staff entries will now display Facebook and Twitter addresses as as the screenshot below shows …
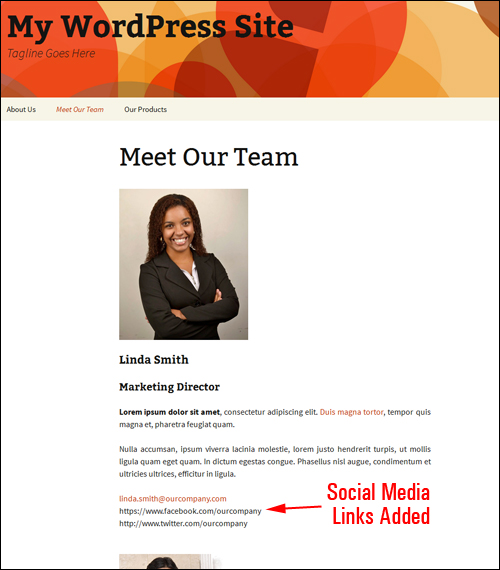
(Directory with social media links)
![]()
Note: If you want to customize your directory but don’t want to mess with CSS styles and template tags or are unsure of what to do, please contact us for assistance.
Usage Menu
As well as being able to customize your directory templates, the Simple Staff List plugin allows you to display your listings differently using modified shortcodes.
In your dashboard menu, select Staff Members >Usage …
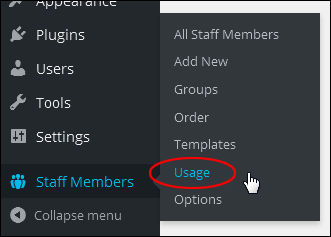
(Staff Members – Usage)
This opens the Usage screen …
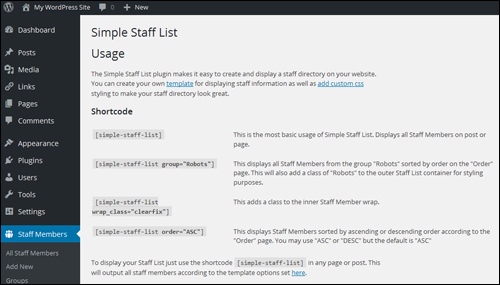
(Usage shortcodes)
This screen lists all different shortcode variations that you can use with the plugin.
A useful shortcode variation you can insert in your page, for example, to display a list of individuals belonging only to a specific group is the shortcode [simple-staff-list group=”group name”], (e.g.:[simple-staff-list group=”sales reps”])
You can also display listings in ascending or descending order by inserting the shortcode [simple-staff-list order=”ASC”] (ascending).
Options Menu
Select Staff Members >Options in the menu …
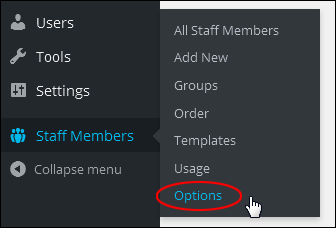
(Staff Members Menu – Options)
This brings up the Options screen …
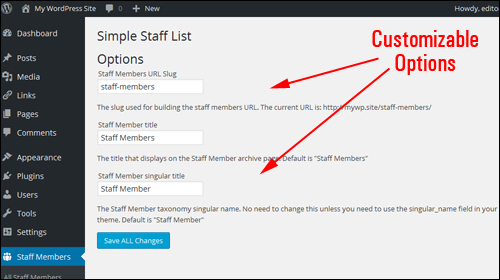
(Simple Staff List – customizable options)
This section lets you change labels like Staff Members URL Slug and Staff Member title
You can also export your staff members details from the Tools > Export screen …
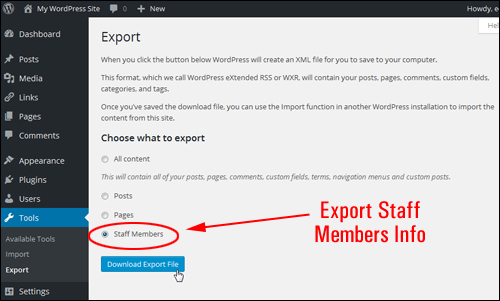
(Export Staff Members plugin information)
If you need additional information about this plugin, visit the Simple Staff List plugin site and request help from the plugin author.
Other WordPress Plugins For Creating Simple Employee Directories
Simple Staff List isn’t the only plugin you can use to build a directory of your staff in WordPress. Here are some other free WordPress plugins you can use:
Modern Team Staff Directory
(Modern Team Staff Directory – WordPress Staff Directory Plugin)
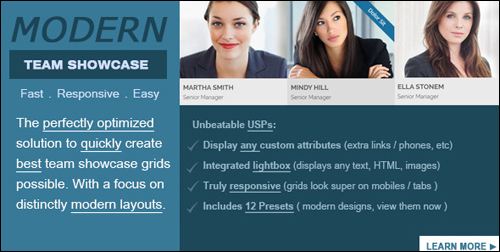
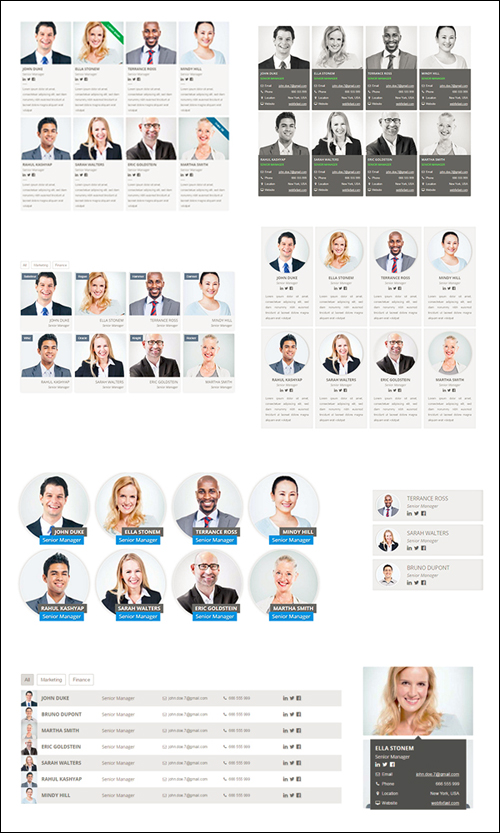
Modern Team Staff Directory helps you collect your team information and showcase it anywhere on your site in beautiful grids, columns and tables. This premium plugin features over a dozen presets and provides editors that make it easy to edit and update your directory.
(Modern Team Staff Directory – Responsive Templates)
Learn more about the plugin here:
Staff Directory
(Staff Directory)
Staff Directory lets you easily create a directory of faculty/staff/team members. The plugin supports staff categories and can be used for companies, teams, etc.
You can also insert custom fields …
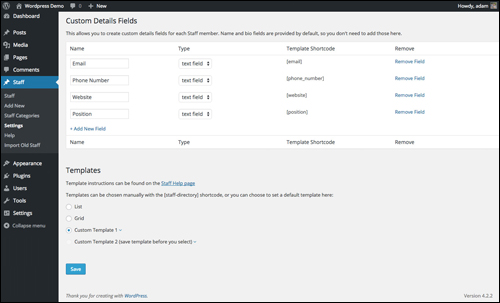
(Custom Details Fields. Screenshot source: Staff Directory website)
Learn more about this plugin here:
Faculty And Staff Directory
(Faculty And Staff Directory)
This plugin was developed to provide a simple and flexible faculty and staff directory for a small college or university.
The plugin also includes a widget that allows you to feature profiles in a widget area.
More info:
Company Directory
(Company Directory – WordPress Staff Directory Plugin)
With the Company Directory plugin, you can easily add your staff to your website. Different layouts are included, including list and customizable single views, plus as fields like job title, email, phone number, image and member bio, allowing you to present your company and capabilities.
Visitors will be able to click through from your list, grid, and table views to learn more about each staff member in a customizable single view …
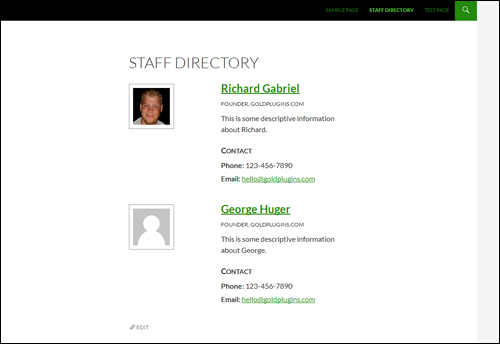
(Display your staff and faculty members in an easy to view format. Screenshot sourced from Company Directory plugin website)
This plugin uses shortcodes.
For more details, visit the plugin site here:
Employee Spotlight
(Employee Spotlight – Plugin For WordPress)
Employee Spotlight displays team members, founders or just an individual member of your team in a four-column circle grid page. This page can be easily created with a setup assistant on plugin activation.
This plugin comes with two sidebar widgets that let you display featured and recent employees, plus two responsive views which adjust to the screen in the viewer’s device.
Detailed information about each employee can be displayed in their own page, as well as in summary …
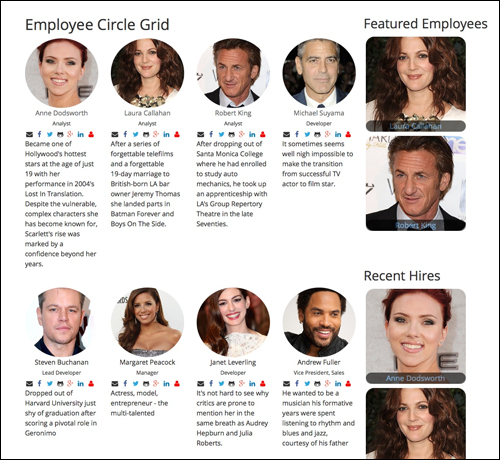
(Responsive layout with circle grid. Screenshot source: plugin website)
More info:
Staffer
(Staffer – Plugin For WordPress)
Staffer uses custom post types for employee management and supports the display of staff members via a shortcode, allowing you to easily create and manage an onsite staff directory …
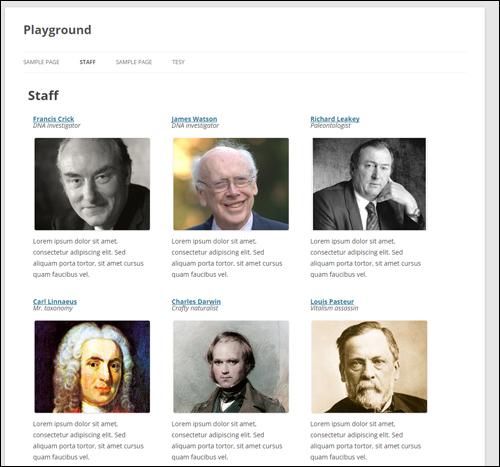
(Staffer archive page. Screenshot source: Staffer website)
Staffer works with many popular WordPress themes, and also allows for custom template use and custom content wrappers.
Go here to learn more about this plugin:
![]()
If the directory plugins listed above aren’t what you’re looking for, just go online or visit the WordPress plugin directory and search for:
- Add Staff Directory To WordPress
- WordPress Staff List
- WordPress Plugin Staff Directory
- Employee Directory WordPress
- etc.
Hopefully, this step-by-step tutorial has explained how to create a simple and easy-to-update employee directory in your site.

Images of persons used to portray staff members were sourced under creative commons license from pixabay.com
***
"These tutorials have so much information and are easy to understand. If you use WordPress or plan to in the future these will help you with everything you need to know." - Valisa (Mesa, Arizona)

